Introduction
Most IT environments have some applications or devices that need to send emails, such as:
- Multifunction printers (scan to email)
- UPS system
- Backup applications
- Monitoring applications
- And a lot more
Let’s look at how to configure a connector in Exchange Online for on-premises devices and applications for SMTP relay.
Office 365 SMTP relay settings
When you set up Office 365 SMTP relay, you will need to:
- Find Public IP address from where it will send the emails
- Find Office 365 domain MX record
- Open port 25 on the organization firewall
- Add Public IP to domain’s SPF record
Find Public IP address
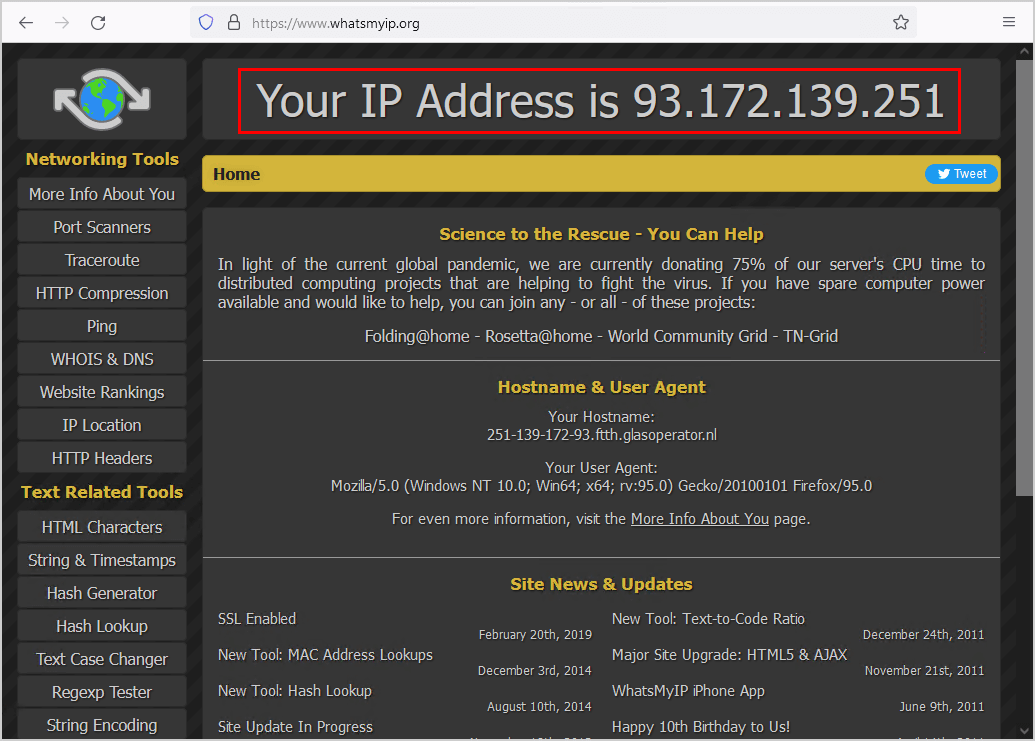
Go to www.whatsmyip.org or any other website that reveals your public IP address. Note down the Public IP address because you need it in the next step.
Note: Get the public IP address from the organization you want to send mail from. This can be multiple IP addresses.
In our example, it’s the Public IP address 93.172.139.251.
Find Office 365 MX record
The MX record l is what you will add to the scanner or application that needs to relay SMTP using Office 365.
To find Office 365 MX record, follow these steps:
- Sign in to Microsoft 365 portal
- Expand Settings and click on Domains
- Click on your domain
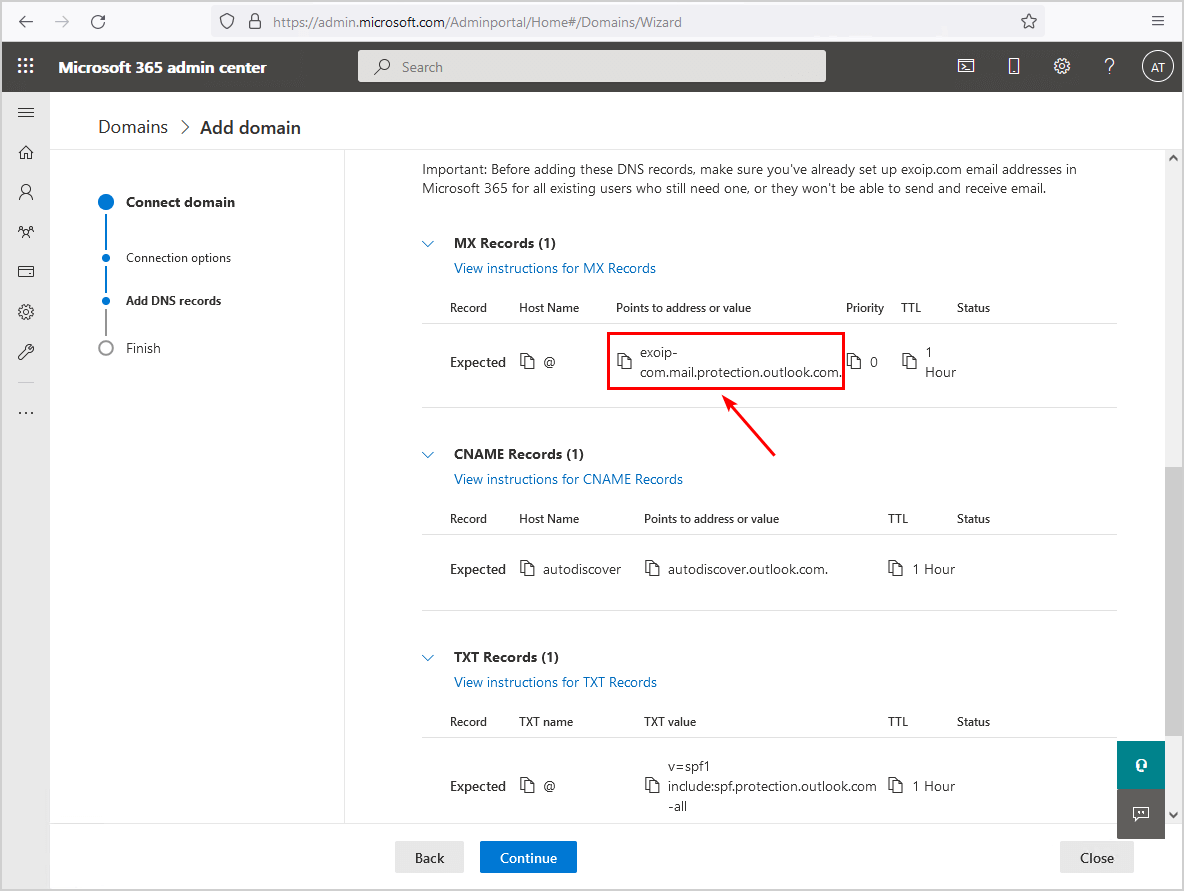
- Go through the wizard and find the MX record
- Copy the Points to address or value field
In our example, it’s the MX record exoip-com.mail.protection.outlook.com.
Open port 25 on firewall
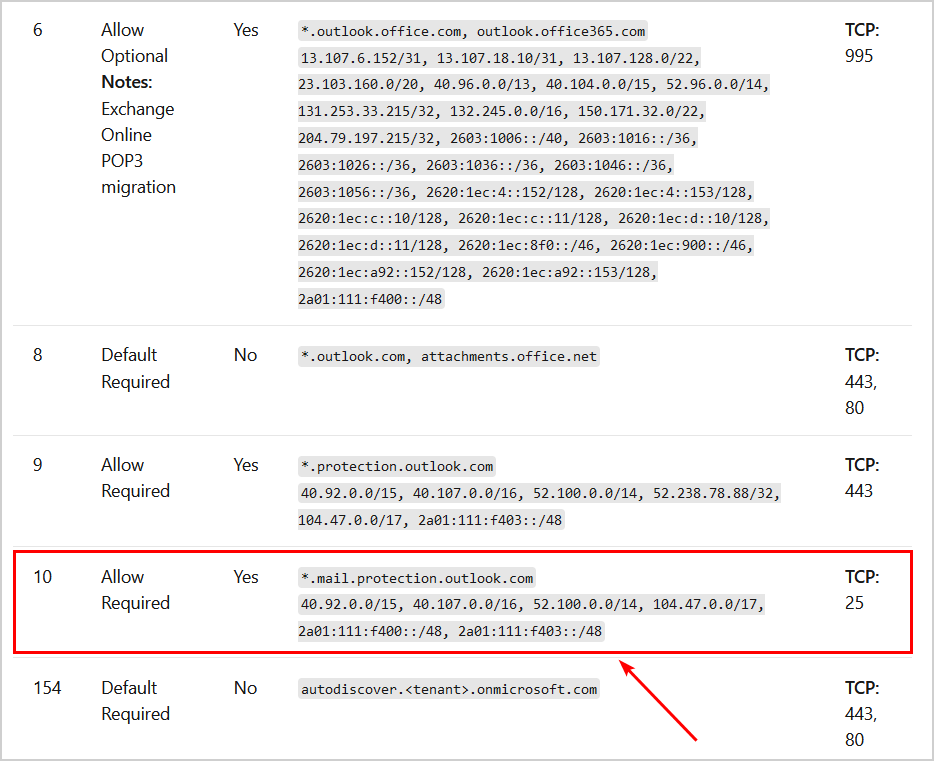
To relay through Office 365 SMTP, you need to open port 25 from the organization firewall to external. The most secure way is to only add the Exchange Online IP addresses in the destination address and not ALL (everyone).
Add public IP to domain’s SPF record
Sign in to the domain’s registrar and open the domain DNS settings. In our example, the domain exoip.com.
The TXT record value for SPF looks like this:
Edit the existing SPF record and add the Public IP address. The effect is that it will also authorize the organization’s Public IP address servers to send emails for the exoip.com domain name.
The new TXT record value for SPF looks like this:
Note: The change can take up to 24 hours, but most of the time, this will resolve within 5-15 minutes.
Read more: Configure SPF record for Office 365 »
Now that you did all the steps, it’s time to configure Office 365 SMTP relay.
How to set up SMTP relay for Office 365
To set up SMTP relay for Office 365, follow these steps:
- Sign in to Exchange admin center
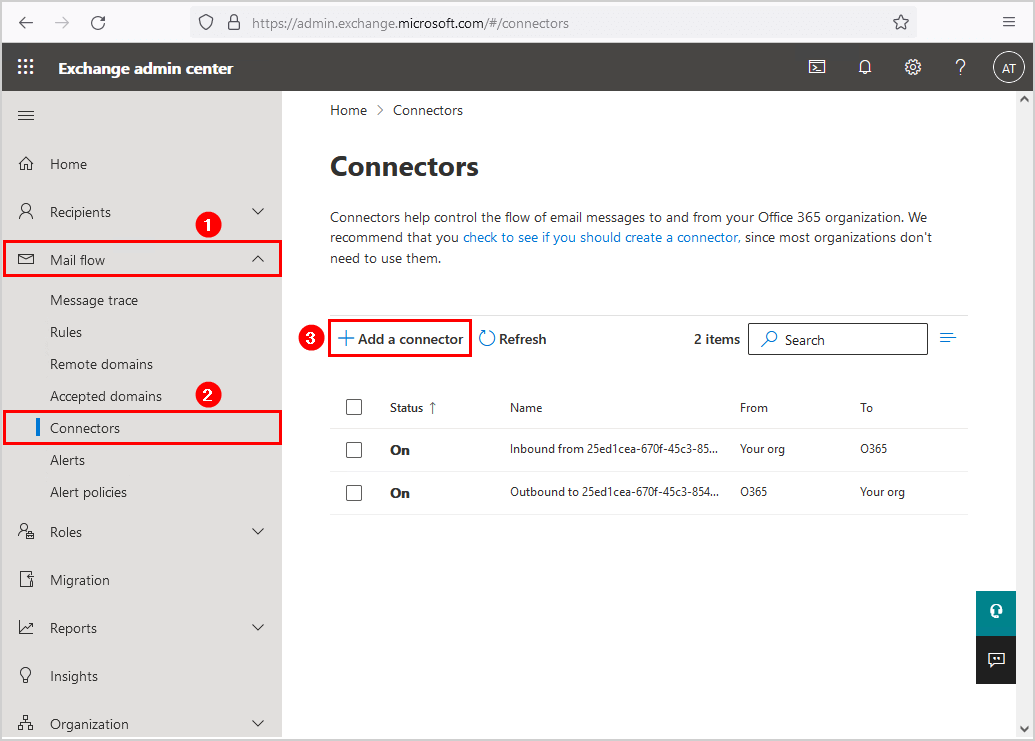
- Click on Mail flow > Connectors
- Click on Add a connector
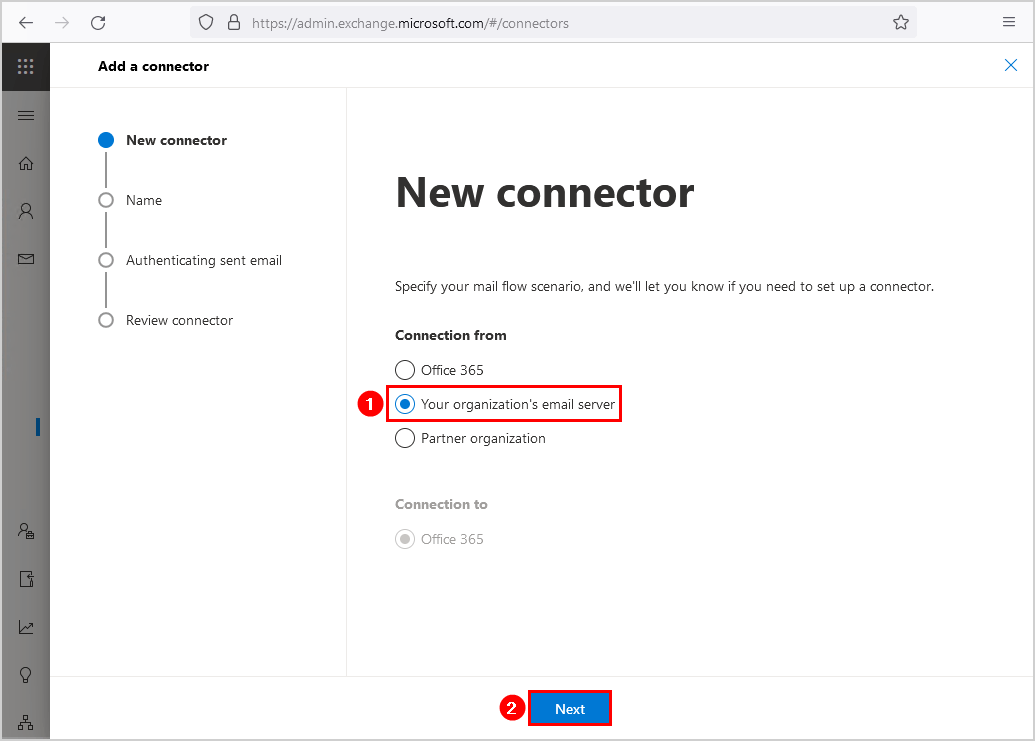
Select Your organization’s email server. Click Next.
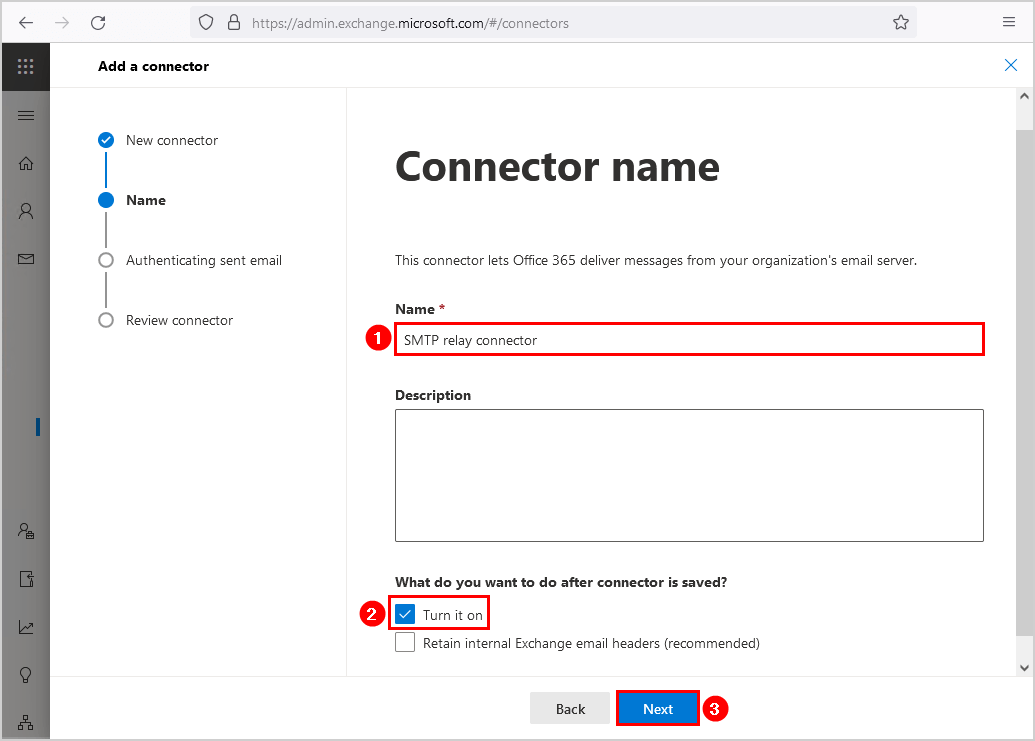
Fill in the connector name SMTP relay connector and Turn it on. Click Next.
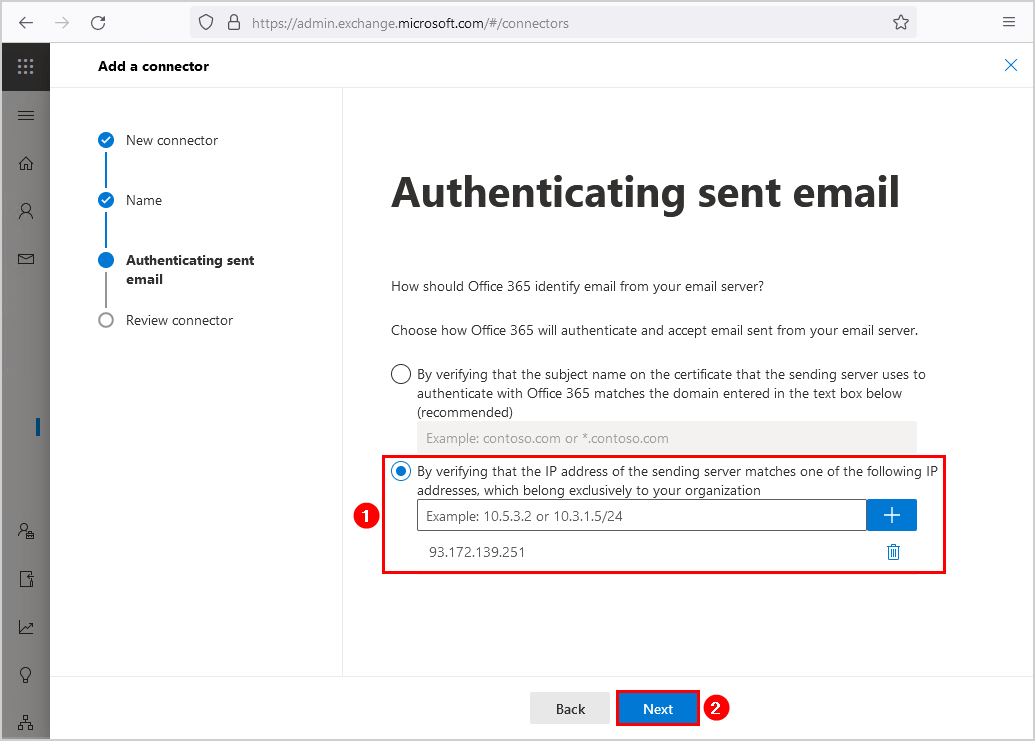
Select By verifying that the IP address of the sending server matches one of the following IP addresses, which belong exclusively to your organization.
Add the Public IP address which you copied from the previous step. Click Next.
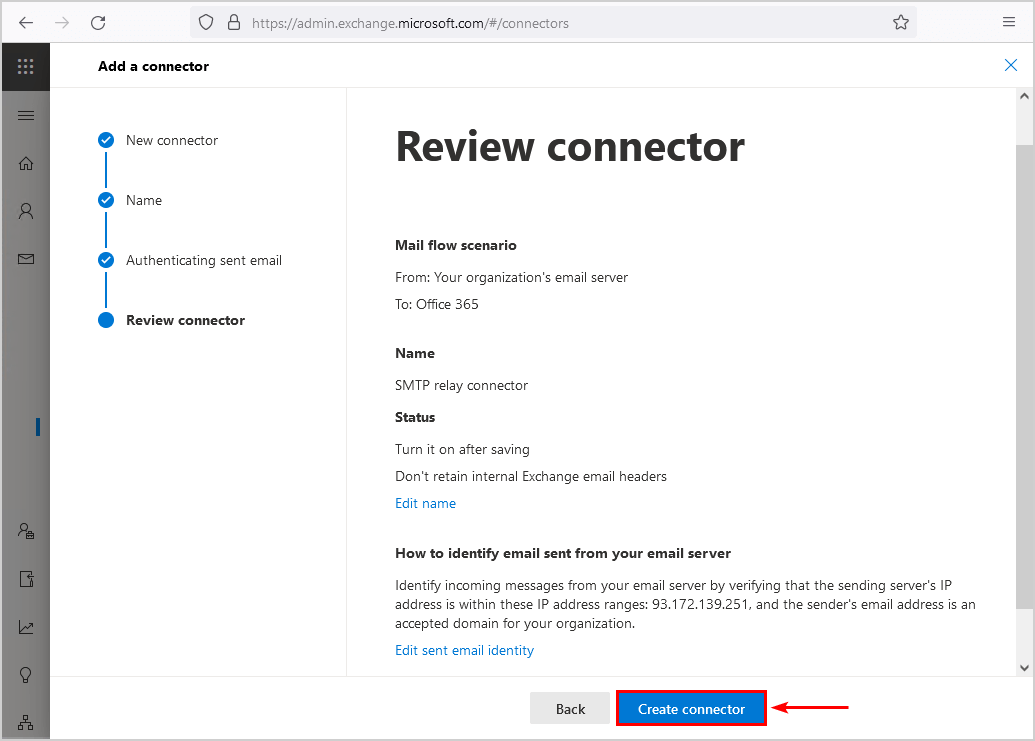
Review the connector and click on Create connector.
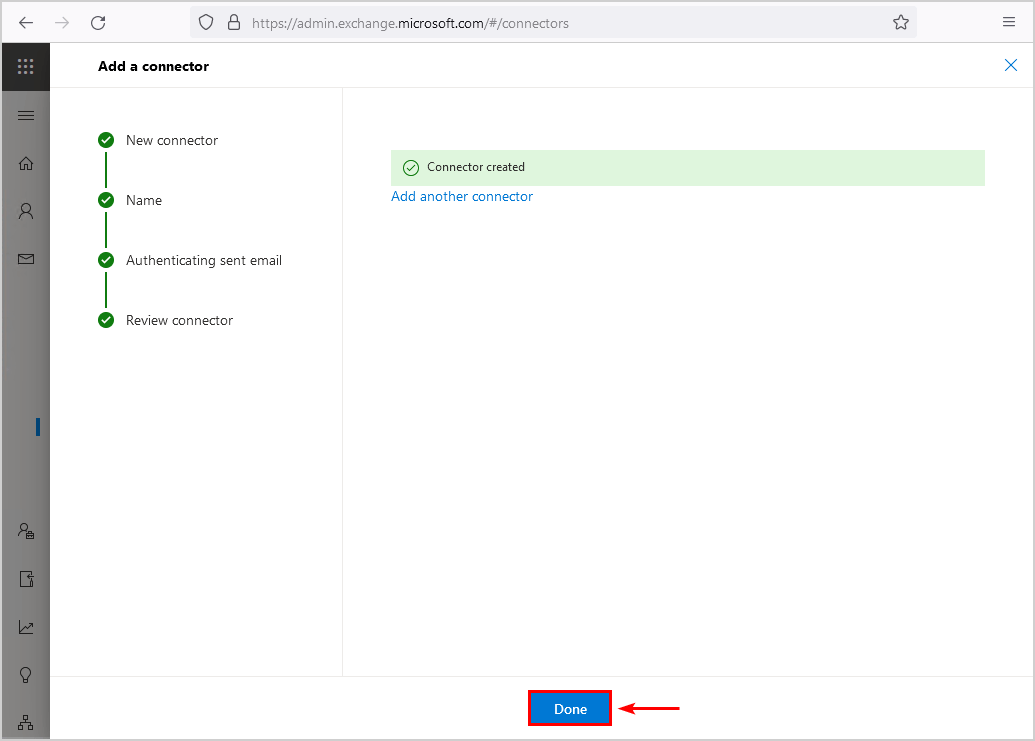
The connector shows up in the Connectors list.
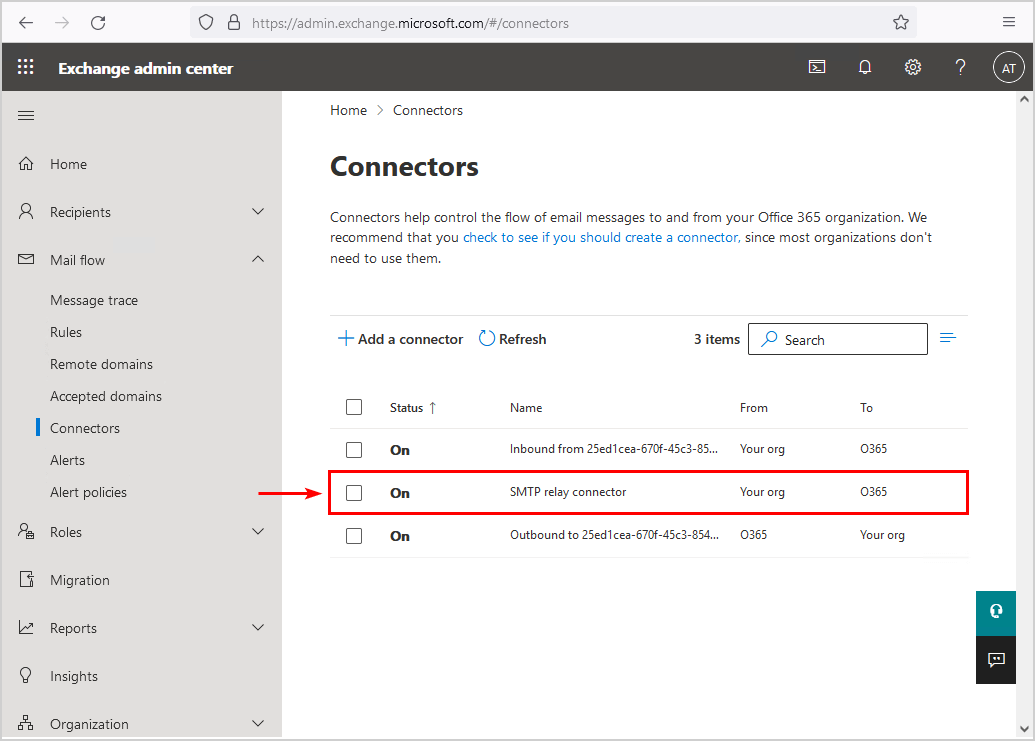
You successfully added an SMTP relay connector in Office 365. As a result, the organization is ready to send emails through Office 365.
Test Office 365 SMTP relay
Test that everything is set up correctly and that email relays through Office 365 successfully. An excellent way to test Office 365 SMTP relay is with the Send-EmailOffice365.ps1 PowerShell script.
Run PowerShell as administrator. Copy the below script or download the Send-EmailOffice365.ps1 PowerShell script. Before you run the script change the fields:
- To
- From
- SmtpServer
No comments:
Post a Comment