ISSUE
When you click on links in emails in Outlook Desktop where the path is to a fully qualified domain name (FQDN) or IP address you may see the following:
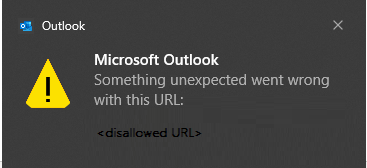
An Outlook warning dialog with the error “Something unexpected went wrong with this URL”
Silent failure for the untrusted file.
When you open links in emails in Outlook Desktop where the path is to either FQDN or IP address or hostname path you will see this dialog. This is also expected.
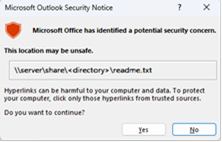
If you need to disable this dialog, follow the instructions in the article Enable or disable hyperlink warning messages in Office programs.
HKEY_CURRENT_USER\software\policies\microsoft\office\16.0\common\security
DWORD: DisableHyperlinkWarning
Value: 1
This issue happens after installing the Outlook Desktop July 11th security updates. For additional information see the respective CVEs below.
MSRC CVE-2023-33151: Microsoft Outlook Spoofing Vulnerability
MSRC CVE-2023-35311: Microsoft Outlook Security Feature Bypass Vulnerability
KB 5002427: Description of the security update for Outlook 2016: July 11, 2023 (KB5002427)
KB 5002432: Description of the security update for Outlook 2013: July 11, 2023 (KB5002432)
STATUS: RESOLUTION
Warning: This workaround may make a computer or a network more vulnerable to attack by malicious users or by malicious software such as viruses. Make sure the FQDN or IP address you add to Trusted Sites is a valid URL path for your company or network.
In order to ensure continued access to files on FQDN or IP address paths add those URLs to the Trusted Sites zone in accordance with Windows guidance, Intranet site is identified as an Internet site when you use an FQDN or an IP address.
Go to Windows Settings.
Search for and open Internet Options.
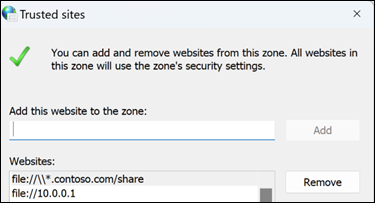
Click the Security tab, then select Trusted Sites.
Add the URL, UNC, FQDN path that you want to allow to "Add this website to the zone".
For example, add file://server.usa.corp.com
Note: If the entry you wish to add does not explicitly start with ‘https:’, you must first uncheck the ‘Require server verification (https) for all sites in this zone’ checkbox before it can be saved.
This workaround can also be deployed via group policy.
GPO: User Configuration
Policy: \\Windows Components\Internet Explorer\Internet Control Panel\Security Page\Site to Zone Assignment List
Tips:
To avoid policy or zone processing failures as a result of incorrect syntax, it is highly advisable to first test the desired policy entry in the Internet Options UI:
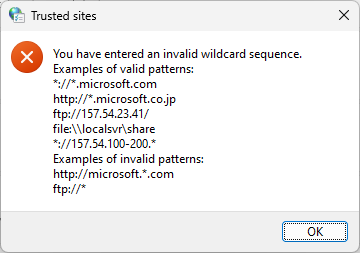
The Group Policy zone management interface does not provide input validation of entered values. By leveraging the tip above, administrators can ensure their policy values will be considered valid before deploying them broadly.
Note: The syntax for adding a URL for files on FQDN or IP address paths to a GPO is different than manually adding a file URL to Internet Options | Security | Trusted Sites. You need to add three forward slashes /// in front of the \\<ipaddress>.
For example:
Manually adding \\10.123.452.37 enters file://10.123.452.37 in Trusted Sites list, this allows the file link to not be blocked.
But for GPO you need to use the following syntax: file:///\\10.123.452.37.
This also enters file://10.123.452.37 in Trusted Sites list and allows the file link to not be blocked.
When you deploy by GPO if you have URLs that do not start with https, you may need to configure the setting to uncheck the box for Require server verification (https) for all sites in this zone.
Note: If the entry you wish to add does not explicitly start with ‘https:’, you must first uncheck the Require server verification (https) for all sites in this zone checkbox before it can be saved.
In order to configure GPO and not have to go through all clients one by one to uncheck the check box, these keys can be used:
HKU\Software\Microsoft\Windows\CurrentVersion\Internet Settings\Zones\2\Flags: 0x00000143(323)
Check box checked:
[HKEY_CURRENT_USER\SOFTWARE\Microsoft\Windows\CurrentVersion\Internet Settings\Zones\2]
"Flags"=dword:00000047
Check box unchecked:
[HKEY_CURRENT_USER\SOFTWARE\Microsoft\Windows\CurrentVersion\Internet Settings\Zones\2]
"Flags"=dword:00000043
In order to add the file shares in registry by GPO, consider the following:
If it’s a Domain
For the Contoso example above, it is set in the registry here:
Computer\HKEY_CURRENT_USER\Software\Microsoft\Windows\CurrentVersion\Internet Settings\ZoneMap\Domains\contoso.com

If it is an IP address, it is set in the registry here:
Computer\HKEY_CURRENT_USER\Software\Microsoft\Windows\CurrentVersion\Internet Settings\ZoneMap\Ranges\Range1

And for each IP address share it is required to create a new Range key under Ranges.