DFS Namespaces are not a new item with 2012R2, they have been around for a long time. In fact DFS existed all of the way back to the NT4 and Windows 95 days.
So what is DFS? DFS stands for Distributed File System.
Sounds fancy but why do I care? Anyone who has ever gone through a file migration or maintains multiple file servers or NAS servers will want to pay attention to this article because it will greatly reduce the impact to your users as files and servers are moved around.
DFS is a collection of folders and targets of those folders. Let’s walk through a hypothetical scenario, and then I will walk through the implementation of it.
Hypothetical scenario:
You are the administrator for Matrix.local….. Just kidding, but let’s pretend the company you work for has multiple file servers or NAS/SAN servers where users access CIFS shares. Sure, in many environments a logon script will work fine map a drive for the users. That’s great until you have to buy a new NAS because the users have filled up the old san with “important” data like pictures of the kids, mp3 files, and sometimes even actual work-related files. Now you need to move half that data to the new san, which means changing every instance where the old server is defined – This means logon scripts have to be analyzed and modified after the data is copied and permissions are reset up, applications that hit the old share now have to be modified to go to the new share, and on and on. You can see where just the planning and implementation of getting that data moved can turn into quite the chore. So how does DFS help me solve this?
Let’s set it up and as we go I can highlight the benefits of using DFS
Open up Server Manager
Open up Server Manager
Click Manage, Add Roles and Features
Click Next on the Before You Begin screen
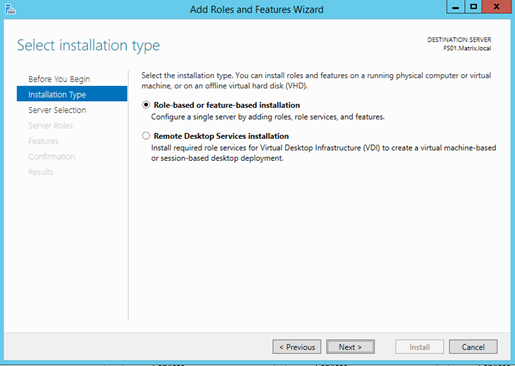
Click Next on the Select installation type
Validate your server is selected and click Next
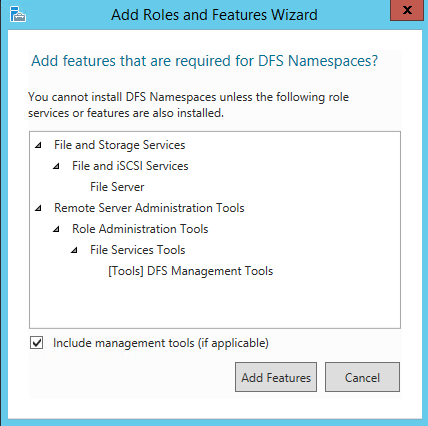
Expand File and Storage Services Expand File and iSCSI Services Click DFS Namespaces
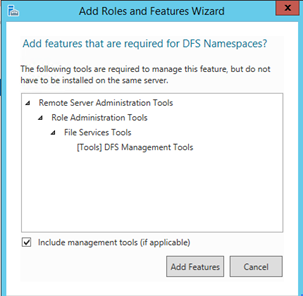
Click Add Features in the popup window for the features that are required
Click Next and then Install
Once the install is done click the close button
Configure the Namespace
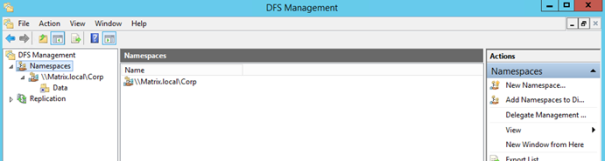
When the DFS Management console comes up essentially empty and will look a lot like:
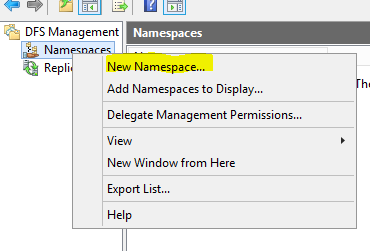
Add a Namespace by right clicking the Namespaces node underneath the DFS Management console or clicking the New Namespace link on the right pane.
In the wizard that comes up select the name of the server you want to host the namespace, Click next
Select the name that you want for the namespace and click next NOTE: You can clicked the edit settings to see or change the path where the folder is created and edit the permissions if necessary but in my example we don’t need to.
On the Namespace type select the type of namespace – I recommend Domain-based in Windows 2008 mode. This will give you the flexibility of adding more root servers, DFS replication, scalability and access-based enumeration. Standalone is the only option when there is no Active Directory or the server is not a member of the domain.
Once the namespace is selected, Click Next and then click Create
Create a Folder (Simple Example)
Highlight your new namespace and right click and select new folder
In my example I am creating a folder for user data so my folder will be \\matrix.local\data\users You could add targets now if you wanted too but will do that as a separate step to demonstrate functionality
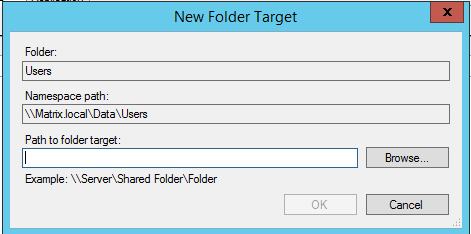
Right click on the folder you just created and select new folder target Add the path to the folder target – in my case its \\DC01\Data1\Users
In this simple example the benefit is now user folders can be mapped using manual mappings, Login Scripts or GPO Preferences by utilizing the \\Matrix.local\Data\Users path. Data on the backend can move and once the target is up dated to the new location, users will then start picking up the new location. While in this example there is a flaw, what about departmental user data where user data is held in different shares? Well here is where the power of DFS comes to the rescue.
Creating an Advanced Folder Structure
Let’s delete the folder users This will get us back to a clean slate
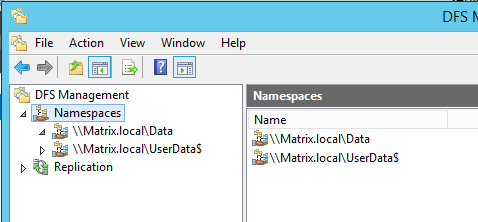
We are going to create a new namespace called UserData$ Adding the $ sign to the end will make it a hidden namespace Should appear once the wizard is done like:
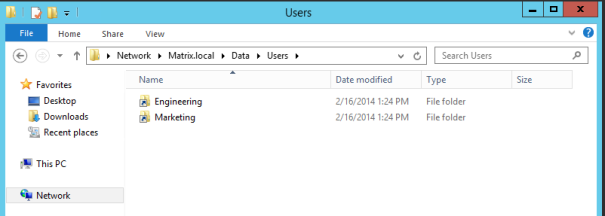
Under User data we are going to add our departmental shares. In my case Marketing and Engineering Marketing is stored in our previous location \\dc01\data1\users Engineering is stored in \\dc01\data2\users Should appear as below:
Issue: Administrator cannot join workstation to domain. Common Cause: DHCP is provided by gateway router that receives and subsequently hands the ISP’s DNS servers to clients. Clients there for are unable to query DNS for the AD SRV records. Fix1: Log into the routers interface, under the DHCP settings, change the dns handed out to point to the Active Directory server(s). Note: If you only have one AD server, hand out only that IP for DNS – do not have an ISP DNS server for a secondary Fix2: If the router cannot be changed then move the DHCP function to a windows server and configure the appropriate options in the scope Fix3: Statically set each client’s DNS settings to the server – this is really the option of last resort, I never recommend manually touching each PC – commonly called sneakerware
Misconfiguration 2.
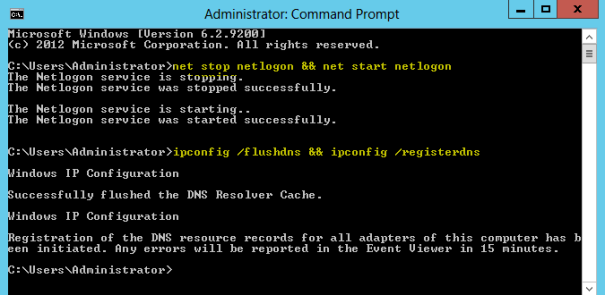
Issue: SRV records for DC are missing in DNS Common Cause: DC points to invalid DNS server or Nic does not have the checkbox to Register in DNS selected. Fix1: Change the DNS to a valid DC if only one DC then point to its IP Address as primary DNS and its loopback (127.0.0.1) as secondary DNS Fix2: Check the box under TCPIPV4 to Register in DNS Note: After either of these fixes are applied run the following highlighted commands from an administrative command prompt
Misconfiguration 3.
Issue: Multiple IP’s are registered for the same domain controller – replication and authentication issues ensue. Common Cause: Multiple nics in the server, whether or not they are used. Fix1: Under network and sharing center, disable all unused nics – delete all invalid dns records for this server in DNS Fix2: If this is a multi-homed server (more than 1 nic enabled and ip’d), select 1 nic to register in DNS and disable registering in DNS for the other nic(s) – delete all invalid dns records for this server in dns Fix3: If this is a multi-homed server (more than 1 nic enabled and ip’d) and the goal is for load balancing or redundancy – look at the teaming options on the nic which will allow the redundancy and load balancing under a single IP (Windows 2012+ does this natively now)
DFS Replication allows for multi-master replication of files located on windows servers. Multi-master is a term we generally frequently in the AD world, but simply means that changes can happen on any server in the replication group, and those changes will replicate to its partners. One important note: DFS-Namespace and DFS-Replication technologies are mutual exclusive and does not require the other to be configured first, but at Dell we do generally see them used together.
Setup:
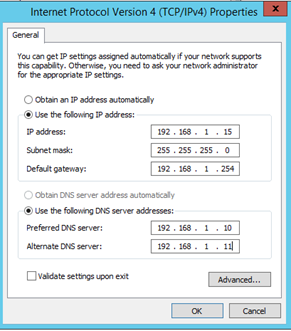
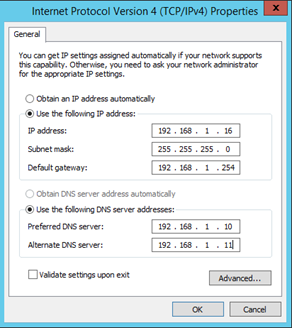
2 DC’s – DC01 (192.168.1.10) and DC02 (192.168.1.11) are domain controllers for the matrix.local domain and are in the Default-First-Site-Name
2 File Servers –
FS01.matrix.local
FS02.matrix.local
Once all the good times of setting IP Addresses, renaming, and joining the domain we are now ready to setup FS01.
The environment is not very complicated: 2 domain controllers and 2 file servers. That said, I needed to generate some test data in order to be have some data to replicate which we’ll do next. I embedded the actual script used to create this data.
Word of warning: some really basic code ahead:
Set objFSO = CreateObject(“Scripting.FileSystemObject”) strStartPath = “C:\Data\CorpData”
strFileName = “Sample” strExt = “.txt”
Set objFolder = objFSO.CreateFolder(strStartPath) for i = 0 to 200 strNewFolder = strStartPath & “\Folder” & i Set objFolder = objFSO.CreateFolder(strNewFolder) for j = 0 to 200 strSubFolder = strNewFolder & “\Subfolder” & i & “-” & j Set objFolder = objFSO.CreateFolder(strSubFolder) for k = 0 to 200 Set objFile = objFSO.CreateTextFile(strSubFolder & “\” & strFileName & i & “-” & j & “-” & k & strExt) next next Set objFile = objFSO.CreateTextFile(strNewFolder & “\” & strFileName & i & strExt) next msgbox “Done”
So that’s all fancy but what does it do? Well first thing is that its vbscript; I am an old vb guy so when I want to whip out some quick code this is what I resort too. Sure you could do this in PowerShell, and given enough time I may eventually do that. Don’t beat me up too much on it. Here are the steps of the script in plain English
Create a folder called c:\Data\CorpData
Then create 201 subfolders called Folder(#) in my case 0 to 200
Then in the sub folder create 201 more folders called SubFolder(#)
In each subfolder create 201 empty files named Sample-Folder#-Subfolder#-File#.txt
Rinse and repeat steps 2-4 for 200 times while creating a file under the original Folder(#)
I know that’s a lot of overkill but since the files are all 0kb and the folders are 0 kb it allows me to create a lot of files and folders really quickly (about 5 to 10 minutes) – this little script creates the following for files and folders: Yes that says 8 million files in 40,602 folders with a 0kb size. While this is not likely what you will see in production, it will allow us to move on to the next step. If your are testing this as well and do not want that many then you could change all the 200’s to 20 in the above script and that would make a lot less files and folders, thus making the whole process quicker.
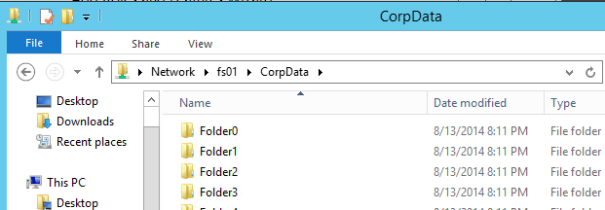
I went ahead and set the corpdata as a share called corpdata – because of all the files and folders this took a really long time – mental note to self “create the share first”.
For users to access at this point they would go to \\fs01.matrix.local\corpdatawhich looks like
Next we’ll install the DFS features.,
Step 1: Install the DFS Namespace, DFS Replication, and DFS Management tools
In Server Manager, Click Manage and select Add Roles and Features – This will bring up the Add Roles and Features Wizard
Note: As soon as you click one of the 2 roles a popup will open prompting to install the DFS Management Tools – Click Add Features
Step 2: Create the Namespace “Data”
While I am not going through all the steps that have been done to get the namespace up and running, for specific steps please see this blog posting here
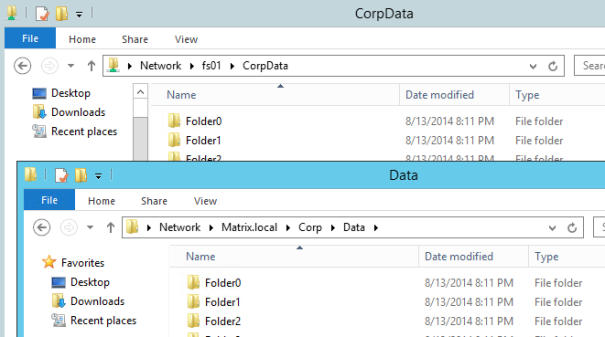
In the above picture we have a domain based namespace called Matrix.local\Corp with a folder named Data. The Data folder has a target of \\fs01.matrix.local\CorpData
Data can be accessed either via directly from the server or namespace
Step 3: Prepare FS02
So time passes and the Matrix powers that be decide that the corporate data needs to be duplicated to FS02. Usually this is to allow either users faster access to the data when located at another site, data redundancy, or as a disaster recovery scenario. Windows 2012 R2 has many enhancements that allow for replication to be faster and much more efficient over previous versions.
While it would be easy to go through the Add Roles and Feature wizard again for FS02, where would the fun be in that? We will configure FS02 with PowerShell.
That command is “Install-WindowsFeature FS-DFS-Namespace, FS-DFS-Replication, RSAT-DFS-Mgmt-Con”
That was much quicker and easier to install than using Server Manager.
Step 4: Create the CorpData share on FS02
The path locally for FS02 will be C:\Data\CorpData
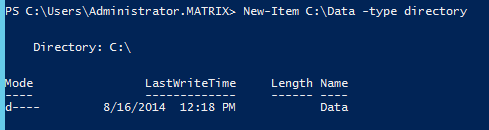
Run the command New-Item C:\Data –Type directory
Run the command New-Item C:\Data\CorpData –Type directory
Open windows explorer and validate the ntfs permissions for the above folders match the FS01 server
This is necessary to keep the permissions consistent – mismatched permissions is a common issue we see in Dell support when DFS replication is used. It is also easier/quicker to set permissions before there is actual data in the folder. Check both folders.
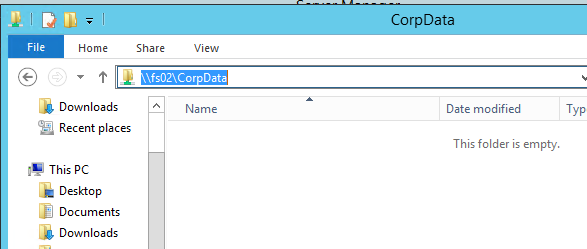
Go ahead and create the share using the same permissions as FS01
Browse to the folder to validate that the share is accessible – there won’t be any data – we will do that next
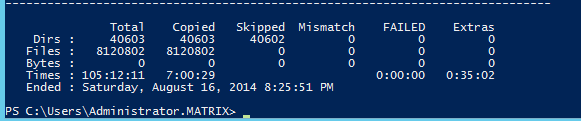
Robocopy \\fs01\corpdata C:\Data\CorpData /e /b /copyall /r:3 /w:1 /MT:64 /XD DfsrPrivate /tee /log:c:\robo.log /v We will run that from FS02.
This will take a while to run – after all, there is 8 million files to copy.
Once complete, validate the copy status – in my test environment there will be no failures because nobody is really accessing the data and it is all text files. In the real world there may be failures, but there is no harm in running the Robocopy command several times. After the initial copy subsequent runs will be quicker because only changed files or new files will be copied. Robocopy gives a pretty good report when the copy is done.
One step that you will want to do is to check the file hash, on 8 million files would be a really tough task to accomplish so I am going to spot check a file or 2 to validate the copy’s file hash matches the FS01 file. Using the Get-DfsrFileHash PowerShell command to get the hash from the source and destination server to visually validate.
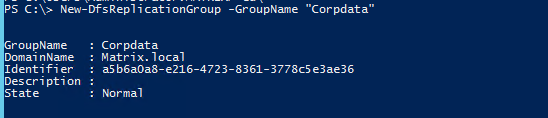
Now we are getting down to actually creating the replication group. Using the DFS Management Interface is easy enough but will not allow for cloning the Replication database because you have to add both members at the time of the creation of the replication group. The reason we want to clone is that with the 8.1 million files initial synchronization will take a really long time while the servers compare and exchange metadata and files. So we will create the replication group on FS01.
Create the Replication Group by running this command
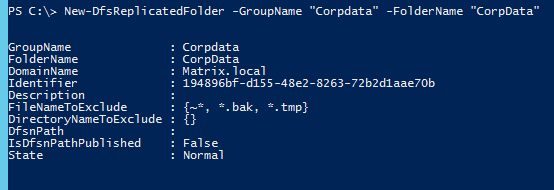
Create the replicated folder by running this command
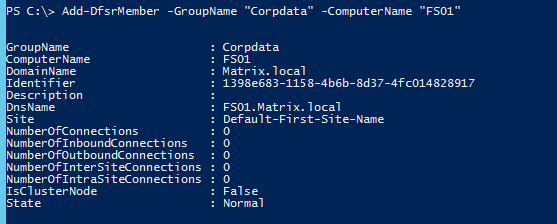
Add FS01 as a member of the replication group
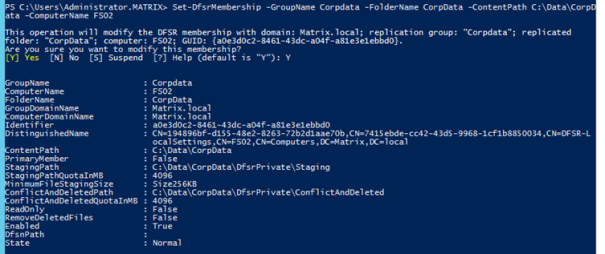
Set the DFSR membership properties including the path of the folder to be replicated
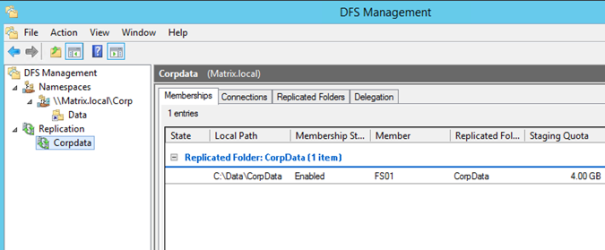
Refresh the DFS Management console and the new replication group and replicated folder will be there
Now I am updating the config from AD by running the PowerShell command Update-DfsrConfigurationFromAD
Before we go to step 7, we need to wait for event 4112 in the DFS Replication log. That event will let us know that we are done and ready to export the DFS Replication database.
Step 7: Export a clone of the Database
First we will need a place to store the clone, so we will create a new folder
Running the following command will export the database:
When the export completes, a message similar to this will be displayed
Step 8: Copy the Clone to FS02
Running Robocopy with the command Robocopy C:\Data\DFSRClone \\FS02\C$\Data\DFSRClone /B
Step 9: Import the Clone
On FS02 run the following command to import the clone from FS01
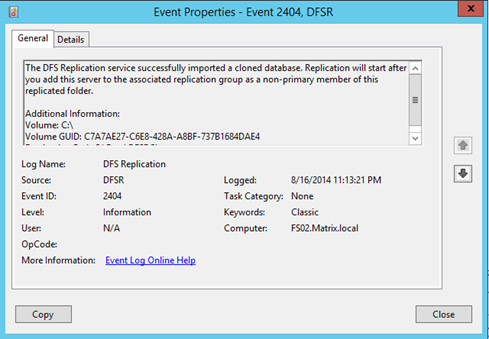
This will take a bit as the Export was 3.3 GB. Either wait for the command to complete, or check the DFS Replication event log for Event 2404 which indicates the import is completed.
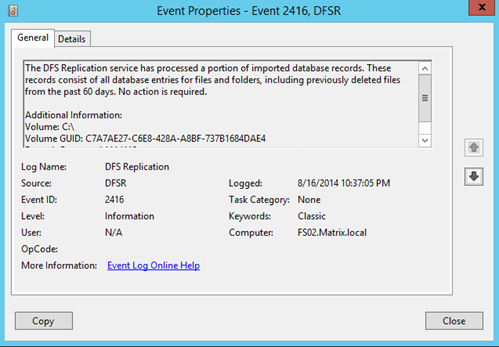
Event ID 2416 in the same log will give you status update information while the import is going on, usually about 4 events a minute.
Step 10: Add FS02 to the Replication Group
In PowerShell on FS02 Run the following 3 commands
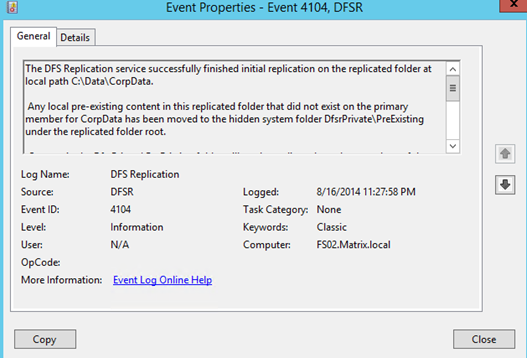
Wait for event 4104 in the DFS Replication log to know when this has been completed
Step 11: Test Replication
Ok now that DFSR is setup let’s validate that everything is working as expected.
In DFS Management, Select the Replication group on the left pane and Select Create Diagnostic Report in the Action Pane.
On the Diagnostic Report Wizard Select Propagation Report
Click Next
On the next screen select the server and folder then click next
On the Next page Click Create
View the results then Close the wizard.
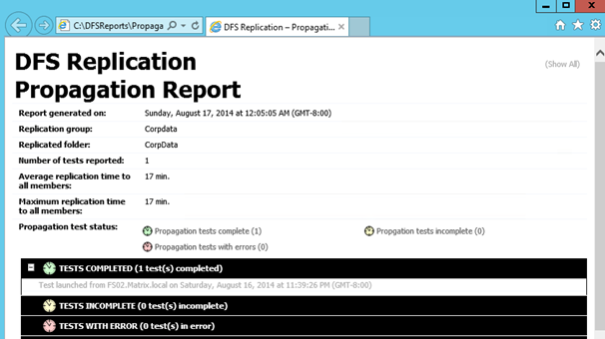
Give some time to pass, a couple minutes or so, then rerun Diagnostic Report Wizard – This time select the propagation report.
Go through the wizard and view the results. A health report is also a good way to monitor health of the replication group.
Additional tests to perform
Test 1: Open one of the text files and modify the contents, validate that change replicates to the other server.
Test 2: The final test would be to create a new folder and a new file in that folder, allow some time to pass then check the other server and validate the data has replicated.