So as the life of Windows 2003 is finally coming to an end, I am seeing a big push for domain upgrades and the pitfalls that come with it. So I created a walkthrough to help that process go smoother and to help avoid the common issues. I included DHCP in this posting due to the many servers I see that are Domain Controllers and DHCP servers. If you are getting DHCP from another device like another server or router, the steps outlined are still applicable as far as changing the DNS server to point to the new DC before you decommission the old DC.
My environment at the start of the migration:
DC01.matrix.local
DC01.matrix.local
OS: Windows 2003 x86 SP1
IP: 192.168.90.1
Subnet: 255.255.255.0
GW: None – completely isolated environment
DNS: 192.168.90.1
Services for clients – DHCP, DNS, Active Directory
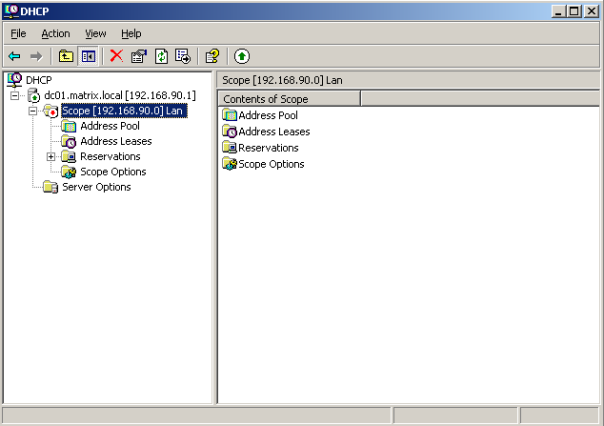
DHCP looks like:

IP: 192.168.90.1
Subnet: 255.255.255.0
GW: None – completely isolated environment
DNS: 192.168.90.1
Services for clients – DHCP, DNS, Active Directory
DHCP looks like:
Note: Excluded the range 192.168.90.1 – 192.168.90.50 as this is how I would normally deploy DHCP – Statically needed IP Addresses would be within the range that was excluded. Examples would be Routers, Servers and Printers.
DNS zones look like this:
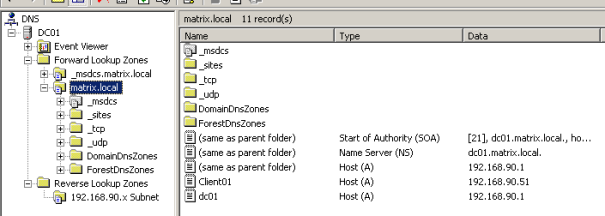
Really everything at this point is default with the exception that I added the reverse zone. Matrix.local and the reverse zone replicated to all DNS servers in domain and the _msdcs zone is replicated to all dns servers in forest.
Client01.matrix.local
OS: Windows 8.1 (I selected this one as client machines tend to get the new stuff especially now with the BYOD or Bring Your Own Device movement)
IP: Dynamically assigned by DC01
Subnet: Dynamically assigned by DC01
GW: None – completely Isolated environment
Client01 is joined to the domain and is able to authenticate, access dns, and gets an IP – the user that is authenticated is Mr. Testy Tester or Matrix\TTester
IP: Dynamically assigned by DC01
Subnet: Dynamically assigned by DC01
GW: None – completely Isolated environment
Client01 is joined to the domain and is able to authenticate, access dns, and gets an IP – the user that is authenticated is Mr. Testy Tester or Matrix\TTester
DC02.matrix.local
OS: Windows 2012R2
IP: Dynamically assigned by DC01
Subnet: Dynamically assigned by DC01
GW: None – completely isolated environment
DNS: 192.168.90.1
IP: Dynamically assigned by DC01
Subnet: Dynamically assigned by DC01
GW: None – completely isolated environment
DNS: 192.168.90.1
Okay, let’s review some configuration items to get us started.
Active Directory:
It’s always best to review the health of active directory to make sure there is no gotchas to sneak up on you. If not installed and you have the install cd for 2003 install the support tools from CD:\Support\Tools\SUPTools.msi or downloaded from http://www.microsoft.com/en-us/download/details.aspx?id=15326.
- From a command prompt run netdom query fsmo as below:

This lets you know where the fsmo’s are located – If any of these has an error where it is unable to locate the role holder, stop because you will need to probably need to seize the role and perform a metadata cleanup.
Seize FSMO Role – http://support.microsoft.com/kb/255504/en-us - Run is a “net share”

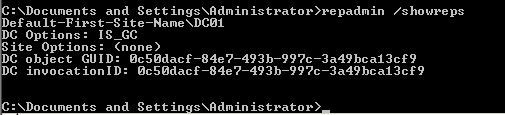
These two shares are where your group policies are stored and if they are missing your DC will not act as a domain controller and will not authenticate users. - Run a repadmin /showreps – if you currently only have 1 dc I would expect the output to look like:
- Check the Eventlogs for errors relating to Active Directory, File Replication Service, Netlogon, Time
- Directory Service
- System
- File Replication Service
If everything appears normal then we are ready to introduce our 2012 R2 server into the environment. If there are errors stop now and investigate!
Setup the new 2012 R2 Server
- Statically set the IP Address of the server
My IP Address will be 192.168.90.2 / Subnet will be 255.255.255.0 / No Gateway/ DNS 192.168.90.1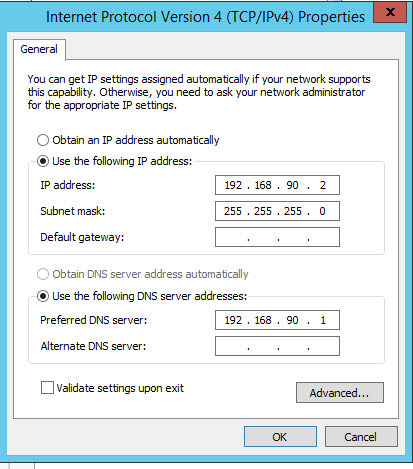
Note:
I don’t have a gateway because my test environment does not have internet access, your environment likely does so you will likely have a gateway. - Rename the server and join the domain with your 2012R2 server

- Once you click OK, you will be prompted for credentials – put the credentials of your domain admin account in and press ok.
If you get a message like: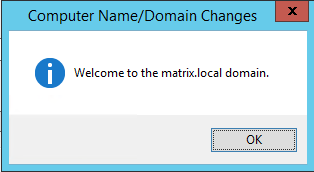
Once the server reboots, sign in as the domain admin account
Note: If you are using the default Administrator account, sign into Windows with Domain\Administrator as Windows by default will change the domain to local when it detects a local account with the same name. - Once Server Manager comes up, Click Manage, Add Roles and Features

- The Add Roles and Features Wizard will come up – Click Next

- Make sure Role-based or feature-based installation is selected and click next.

- Verify your sever is the selected server then click next

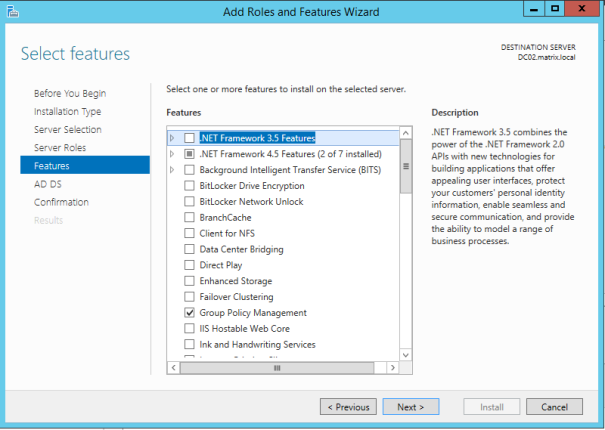
- Select Active Directory Domain Services, on the popup click Add Features, then Click next

- Click next on the features page
- Click Next on the AD DS page

- Then Click Install

Promote Server to a Domain Controller
- Once that completes Click Close, You will be back on the Server Manager Screen – Click the Flag on the Top Menu and select the link to promote the server to a domain controller

- This will start the process to make this a domain controller

Make sure the Domain information, Add a domain controller to an existing domain, and the current domain administrator is correct. - This would be a good time to make sure that the user doing the promotion is a member of the Enterprise Admins and Schema Admins group on the 2003 domain controller.
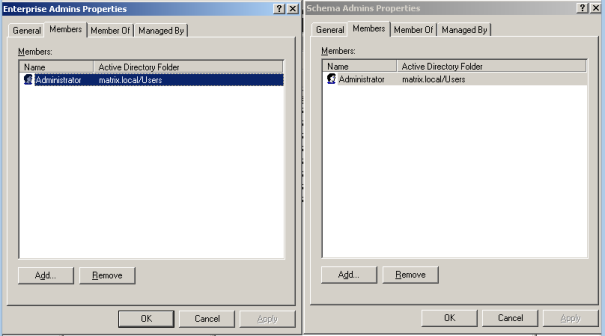
Being a member of these 2 groups will allow you to promote the DC into the domain and perform the necessary schema updates needed for 2012 R2. - Clicking next on the Active Directory Domain Services Configuration Wizard I received an error

Fixing this issue is fairly simple, we just need to raise the Domain and Forest Functional to 2003 - Open Domains and Trusts on the 2003 DC
Right click on the Active Directory Domains and Trusts, Select Raise Forest Functional Level
If you get a message like:
You will need to do the domain functional level first. - Open Active Directory Users and Computers
Right click on the domain in the left pain and select Raise Domain Functional Level
Select Windows Server 2003 from the dropdown and click Raise - Once that completes, and if you have more than one domain controller, replication completes. Go back to Domains and Trusts
Right click and raise Forest Functional Level
Again if there are more than one domain controller it may take a minute to replicate, if not than this change is really quick. - We are now ready to try the promotion process again, Click Next on the deployment configuration
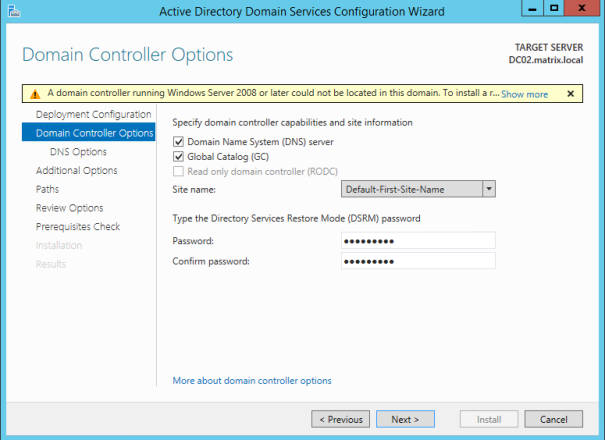
Note: We get a warning stating that there are no 2008 domain controllers in the domain so this server will be unable to become a read-only domain controller. This is just a warning and nothing to be concerned about. - Type in the Directory Services Restore Mode password and click next
- Under DNS option there is another warning about DNS delegation, ignore that and click next

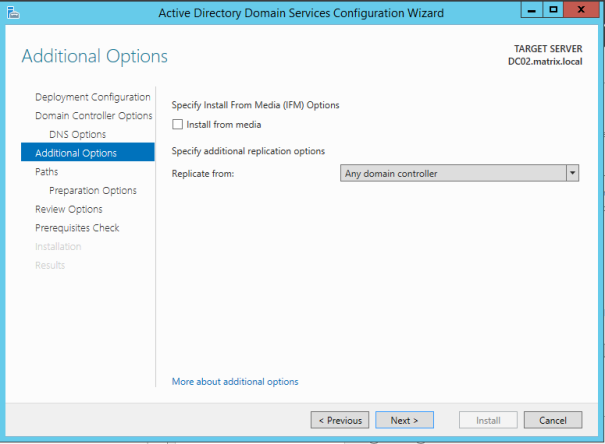
- Additional Options: Click Next
- Under Paths, Modify any paths or accept the defaults and click Next

- Under Preparation Options click Next

- Under Review Options, Click Next

- After the Prerequisite Check Runs Click Install
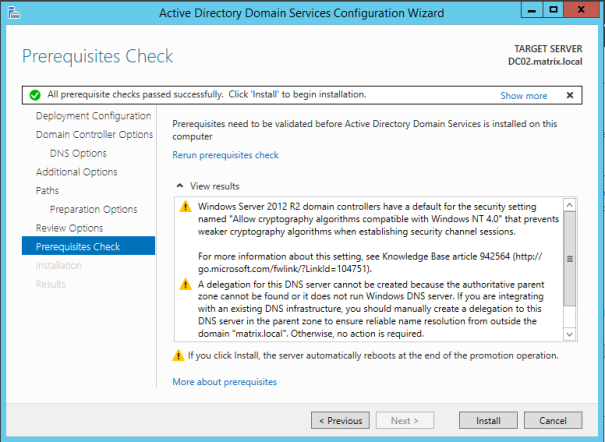
- After install is clicked the forest and domain will be prepped for 2012. Once the install is completed and the server reboots and will then come up as a domain controller in your domain.
Verify Active Directory on the New Server
- One of the first things to validate is that the Netlogon and Sysvol shares
Run net share from PowerShell
- Run repadmin /showreps – notice we get a lot more information this time

- Lets also check that on the 2003 server

- Lets check DNS on the new 2012R2 server

What you want to look at here is to make sure that both DC’s have SRV records inside dns. SRV records is how clients locate available DC’s in which to use for authentication. You can also validate that the same records appear on the 2003 server. - Check the event logs
- Open Active Directory Users and computers, create a test user validate that it replicates from 2012 to 2003, then rinse and repeat from 2003 to 2012
- Open Group Policy Management console and validate all group policies that are expected to be there are there
Decommission 2003 Server
- Transfer the FSMO roles to new server
- PDC – http://technet.microsoft.com/en-us/library/cc739670(v=WS.10).aspx
- RID – http://technet.microsoft.com/en-us/library/cc781063(v=ws.10).aspx
- Infrastructure – http://technet.microsoft.com/en-us/library/cc782485(v=ws.10).aspx
- Domain Naming Master – http://technet.microsoft.com/en-us/library/cc738685(v=ws.10).aspx
- Schema – http://technet.microsoft.com/en-us/library/cc759254(v=ws.10).aspx
- Transfer DHCP services to the new server
- Install the feature on the 2012R2 server
- In Server Manager, Click Manage, Add Roles and Features
- Role-based or Feature-based – Click Next
- Validate 2012 is selected Click Next
- Select DHCP from the list, Click Add features from the Pop-up, Click next
- Click Next
- Click Next
- Click Install
- Configure the scope for DHCP (I deliberately broke this up into three distinct steps, Setting up DHCP on the new server, deactivating the old server and Activating the new server – this is to allow the cutover to be planned according to a migration schedule. In an actual migration I would lower the lease times to something really short 2 days to allow clients to renew their leases from the new server without administrative intervention)
- Click Complete DHCP configuration

- Click Next

- Select Skip AD Authorization (We already have an Authorized DHCP server)

- Select Commit
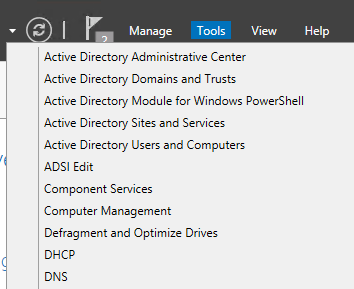
- Select Tools, DHCP
- In DHCP MMC, Drill down to IPv4, Right Click and select New Scope

- Under New Scope Wizard select Next
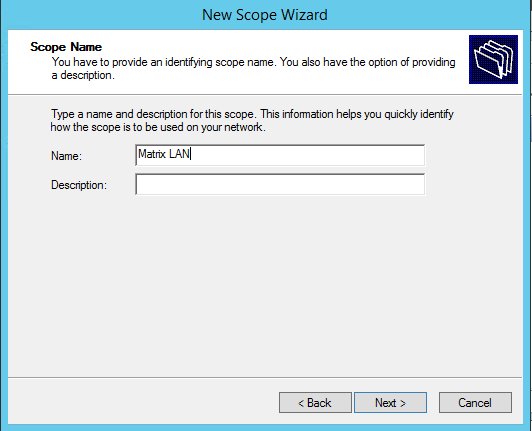
- Name your new Scope and click Next
- Set your Range up and Click Next

- Set up your Exclusion Range

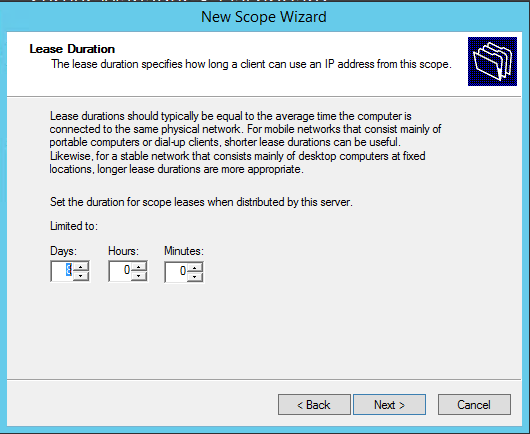
- Setup your Lease Duration Time
- Select Yes to configure the scope Options, Select Next

- Set your gateway address

- On Domain Name and DNS Servers, Remove any old DNS servers so that only the new 2012 Server is listed

- Leave Wins Blank, Click Next
- On Activate Scope, Select No, I will activate this scope later, Then Select Next

- Click Finish
- Click Complete DHCP configuration
- Deactivate the 2003 DHCP Server
- Right Click the Scope and Select Deactivate – I am deactivating the scope – in case the server is reathorized later – the server will not automatically start handing out IP’s
- Right Click the Server and Unauthorize

- Right Click the Scope and Select Deactivate – I am deactivating the scope – in case the server is reathorized later – the server will not automatically start handing out IP’s
- Turn on DHCP on the new 2012R2 Server
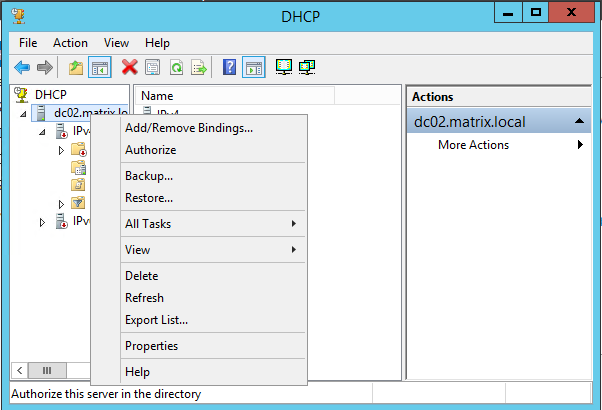
- In the DHCP MMC, Right Click the Server Name and select Authorize
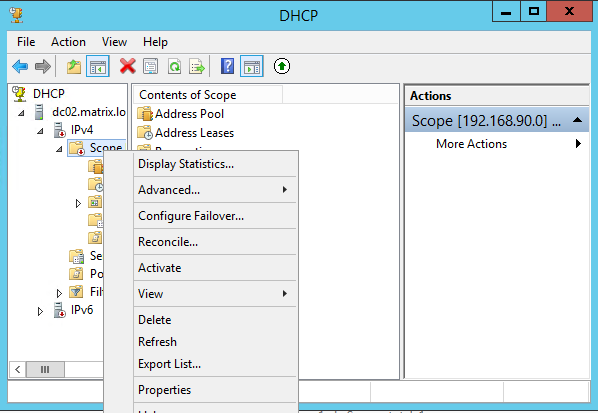
- Right Click the Scope and Select Activate
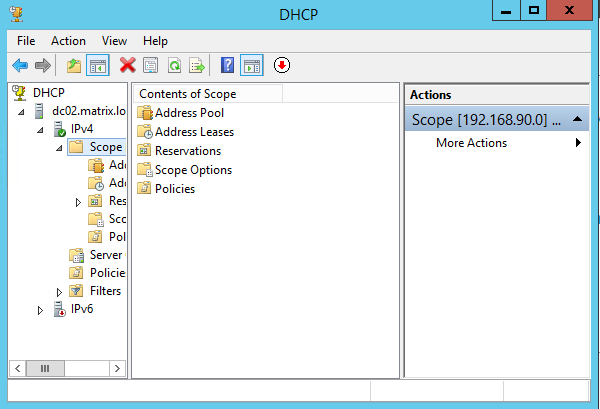
- DHCP Console should appear similiarly to:
- In the DHCP MMC, Right Click the Server Name and select Authorize
- Validate clients receive DHCP Address from the new server
- Check current settings, notice that the lease from the old server is still good so this client has not yet requested a renewal on the lease, this is important because the DNS server for the client has changed – if we were to demote the 2003 server at this time the clients would have issues resolving and authenticating

- On the client run IPConfig /Release

- On the Client run IPconfig /renew

- Then Validate that the 2012 R2 server handed the clients IP Address

- Check current settings, notice that the lease from the old server is still good so this client has not yet requested a renewal on the lease, this is important because the DNS server for the client has changed – if we were to demote the 2003 server at this time the clients would have issues resolving and authenticating
- Once all FSMO’s, DHCP to all clients have been updated shut down the old server for a few days to make sure nothing was missed and that clients are able to authenticate to Active Directory, Get to the internet, etc
- Last step is to demote the 2003 server
- Run DCPromo on 2003, Click Next
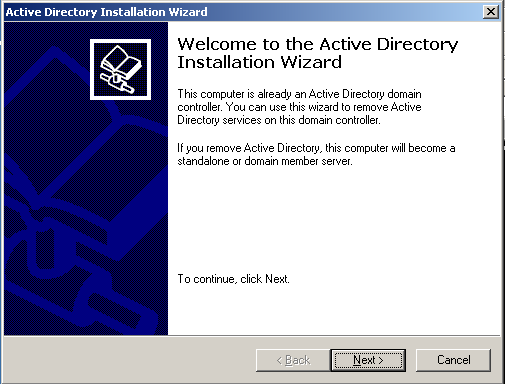
- Do not select this is the last domain controller in the domain, Click Next

- Type a new Local Administrator Password, Click Next
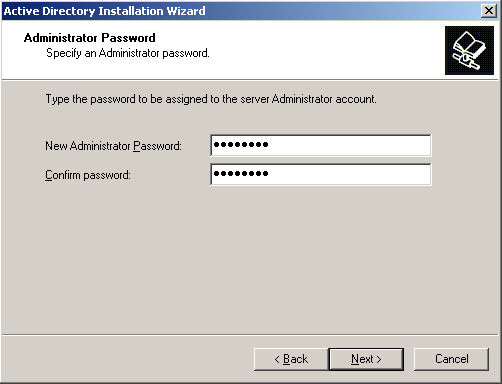
- Click Next on the Summary Screen

- Active Directory will then be removed, and the server will be rebooted

- Run DCPromo on 2003, Click Next
No comments:
Post a Comment