Active Directory Federation Services (AD S) in the Windows Server 2012 R2 OS provides flexibility for organizations that want to enable their users to log on to applications that are located on a local network, at a partner company, or in an online service.
With ADFS, your company can manage its own user accounts, and users only have to remember one set of credentials.
However, those credentials can provide access to a variety of applications, which typically are located in different locations.
ADFS is compliant with common Web services standards, thus enabling interoperability with identity federation solutions that other vendors provide.
AD FS addresses a variety of business scenarios where the typical authentication mechanisms used in an organization do not work.
More info & reading : http://technet.microsoft.com/en-us/windowsserver/dd448613.aspx
For this basic ADFS demo, i’m using my previous VM which is my domain controller (DC1), member server (SVR1) and 1 windows 8.1 client PC…
1st – Create a DNS record for AD FS
1 – On Domain controller (DC1) server, open DNS console and add new host…

2 – In the New Host box, type adfs, in the IP address box, type 172.16.0.10, and then click Add Host…
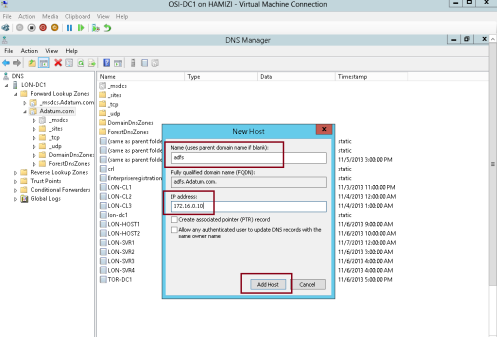
3 – Then click OK…

** before we proceed, make sure you create a new AD user called adfsService…
2nd – Install AD FS
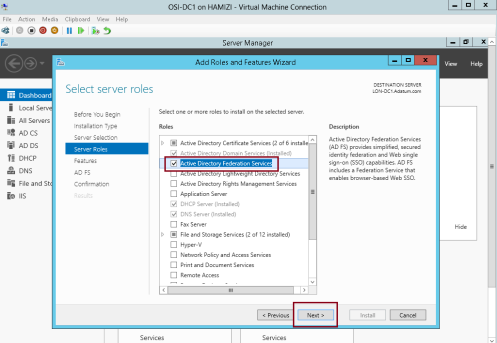
1 – Still on the DC1 domain server, open server manager, click Add Roles and Features, proceed the step until you get Select server roles interface, and then click Active Directory Federation Services, then proceed with next…
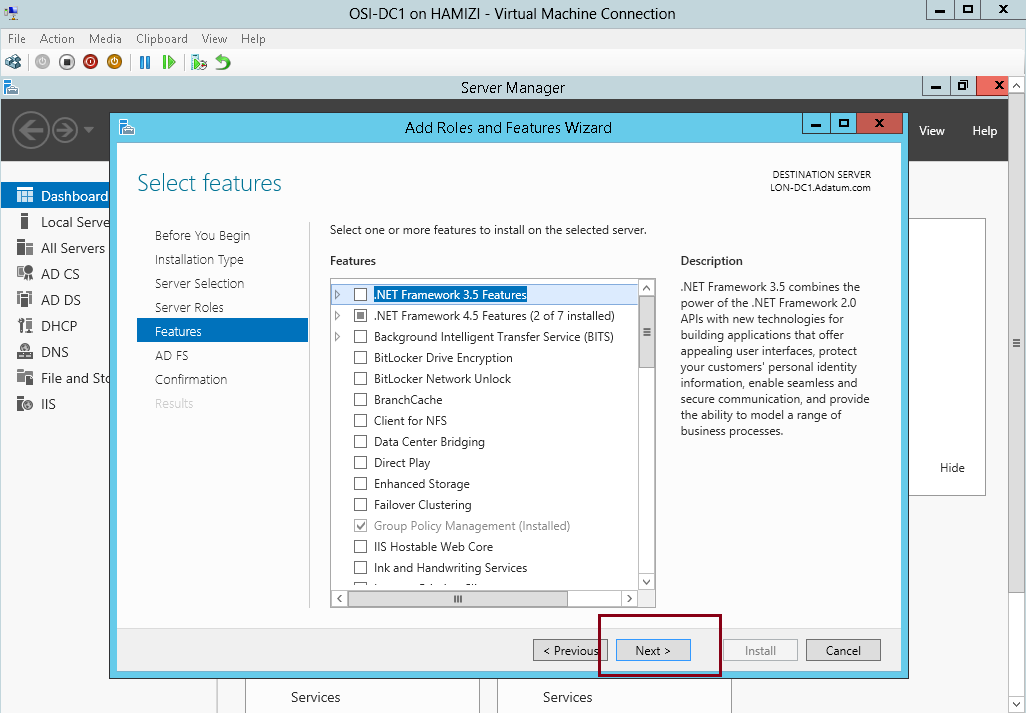
2 – On the Select features interface, click Next…

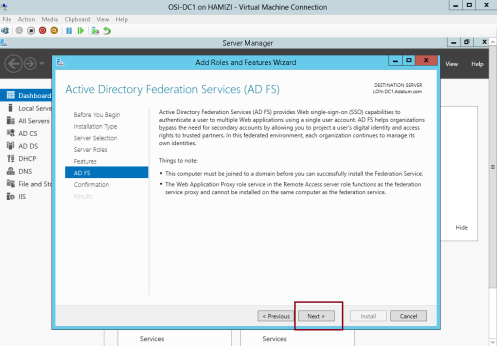
3 – On the Active Directory Federation Services (AD FS) interface, click Next…
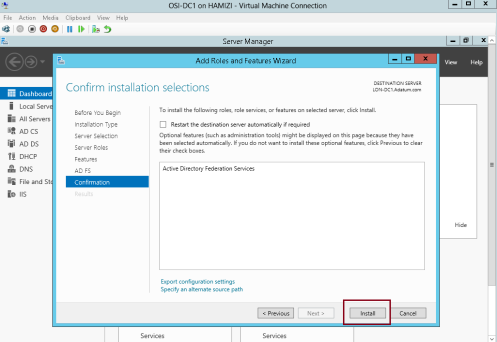
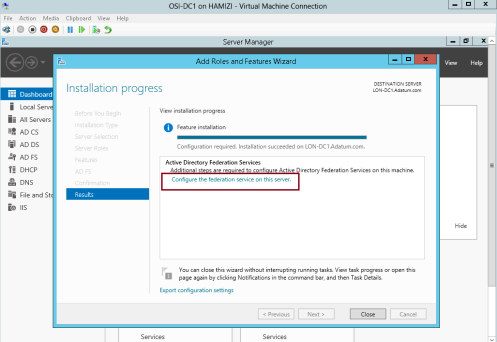
4 – then click Install…
5 – Once the installation completed, click Configure the federation service on this server…
3rd – Configure AD FS
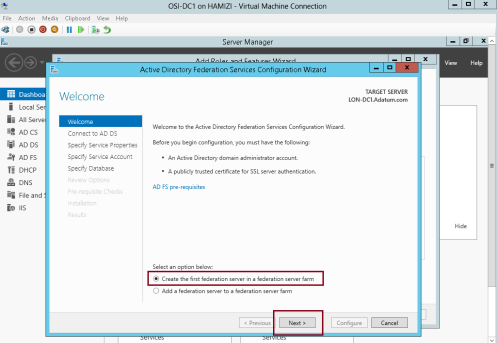
1 – on the Welcome interface, click Create the first federation server in a federation server farm, and then click Next…
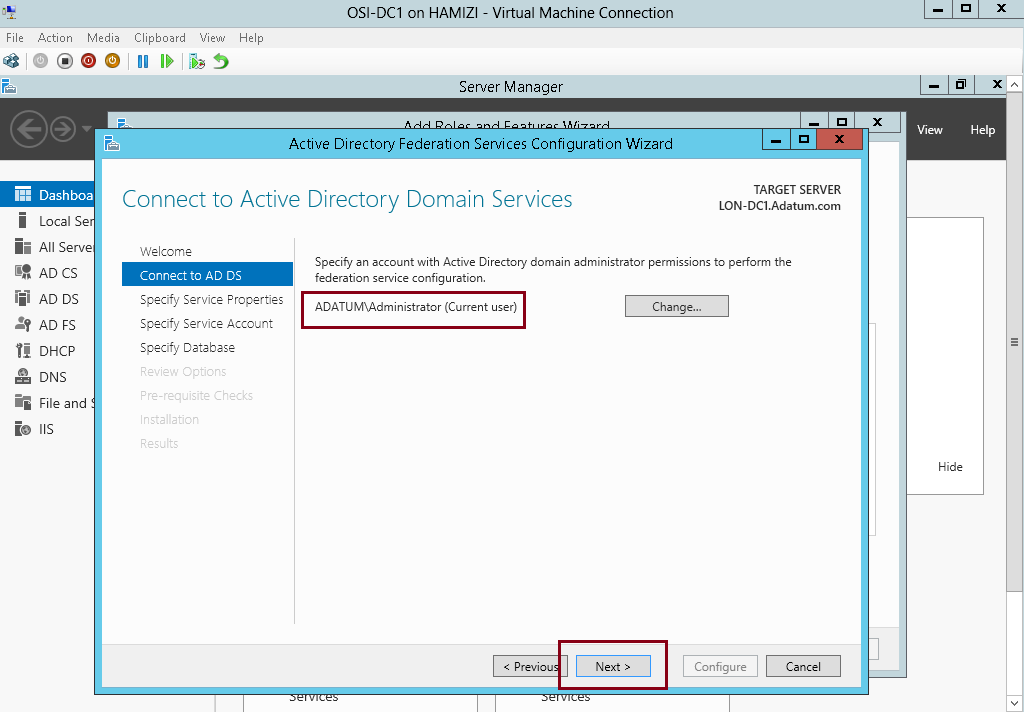
2 – On the Connect to Active Directory Domain Services interface, proceed with Next…

3 – On the Specify Service Properties interface, in the SSL Certificate box, select adfs.adatum.com…
** In the Federation Service Display box, type Adatum Organization, and then click Next…

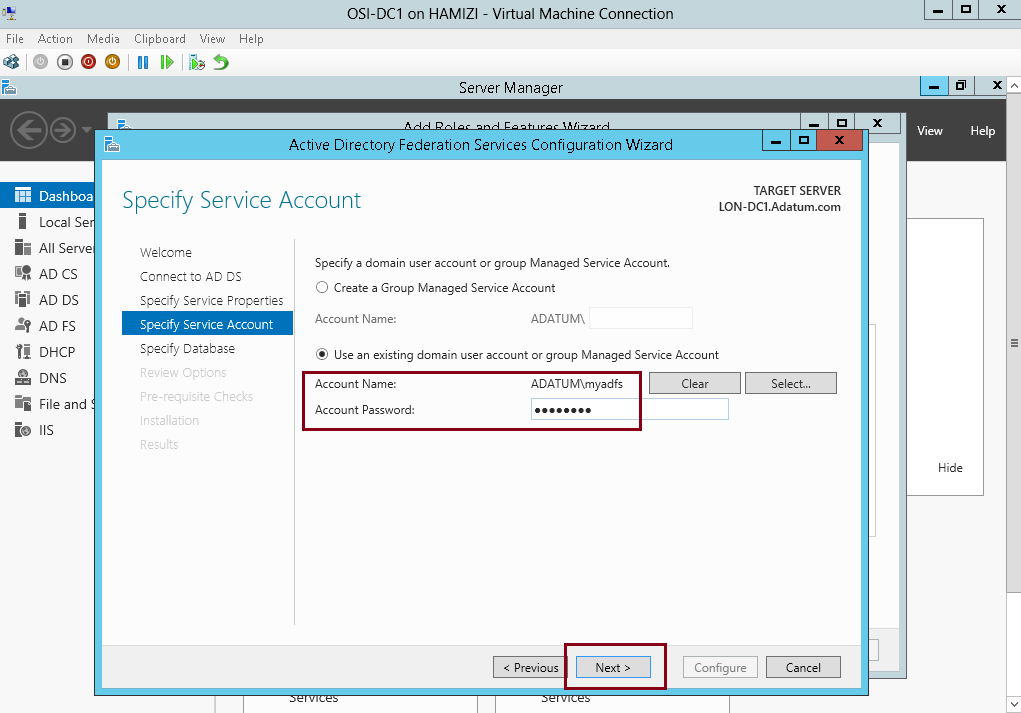
4 – On the Specify Service Account interface, click Use an existing domain user account or group Managed Service Account and then choose adfs user that you created previously, and then click next…

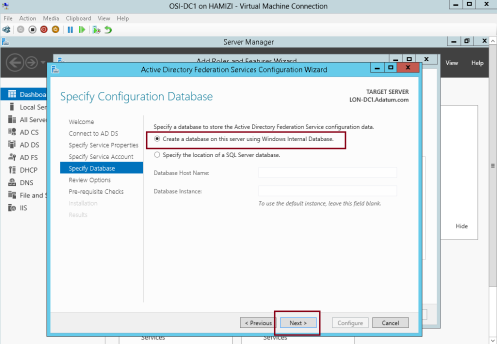
5 – On the Specify Configuration Database interface, click Create a database on this server using Windows Internal Database, and then click Next…
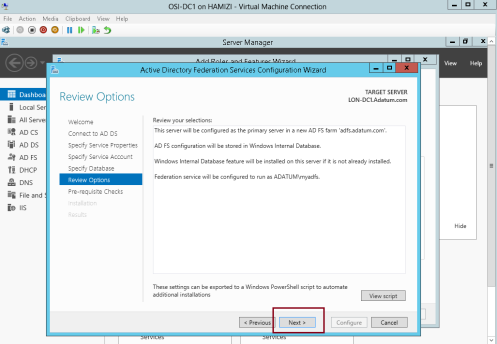
6 – On the Review Options interface, click Next…
7 – On the Pre-requisite Checks interface, verify that all prerequisite passed and then click Configure…

8 – On the Results interface, click Close…
** Please take note that adfs.adatum.com certificate was preconfigured for this task. In your own environment, you need to obtain this certificate.

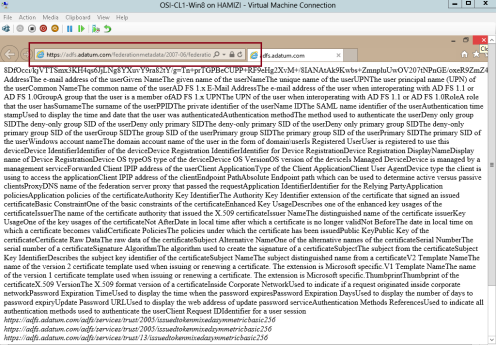
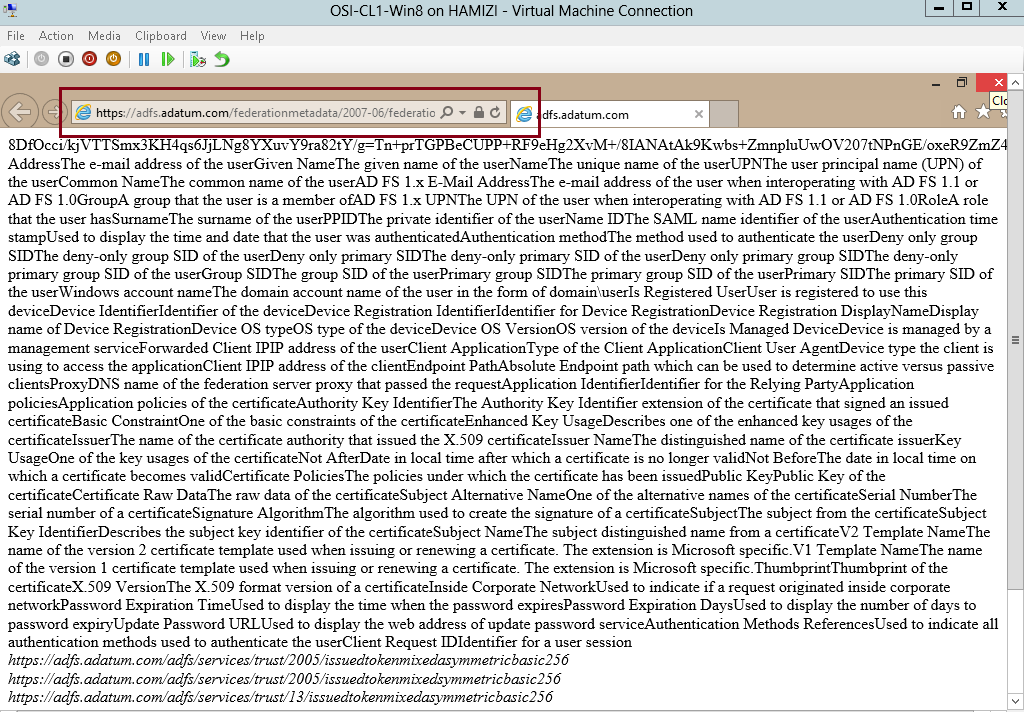
9 – to verify the ADFS functionality, log in to Windows 8.1 client PC as a AD user, and the open IE and type : https://adfs.adatum.com/federationmetadata/2007-06/federationmetadata.xml, and then verify that the file loads successfully…
4th – Configure a certificate for the application
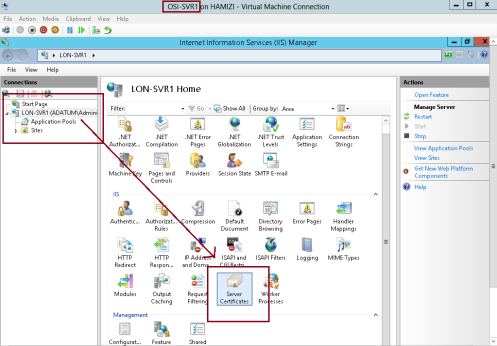
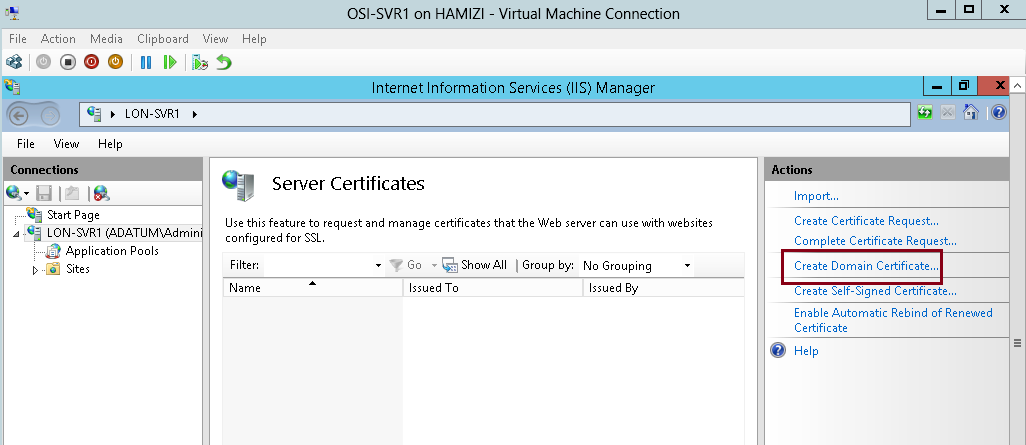
1 – Now switch to SVR1 server and open Internet Information Services (IIS) Manager and then open Server
Certificates…
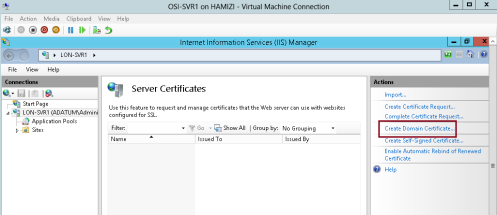
2 – then click Create Domain Certificate…
3 – In the Create Certificate interface on the Distinguished Name Properties, enter the following information (please refer to snapshot), and then click Next…

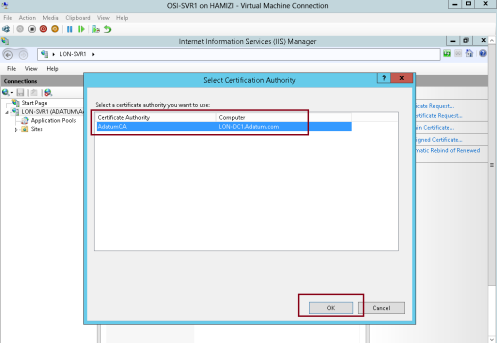
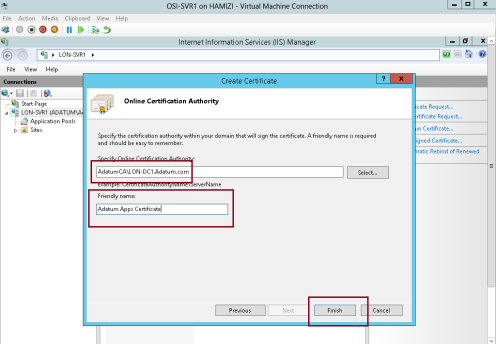
4 – On the Online Certification Authority interface, click Select…

5 – click AdatumCA, and then click OK…
6 – On the Online Certification Authority interface, in the Friendly name box, type Adatum Apps Certificate, and then click Finish…
7 – In IIS Manager, expand Sites, click Default Web Site, and then click Bindings…

8 – In the Site Bindings interface, click Add…

9 – In the Add Site Binding interface, in the Type box, select https, then in the SSL certificate box, select Adatum Apps Certificate, and then click OK…

5th – Configure the Active Directory claims-provider trust
1 – Switch to DC1 server, and open AD FS Management, expand Trust Relationships, and then click Claims Provider
Trusts, in the middle pane, right-click Active Directory, and then click Edit Claim Rules…

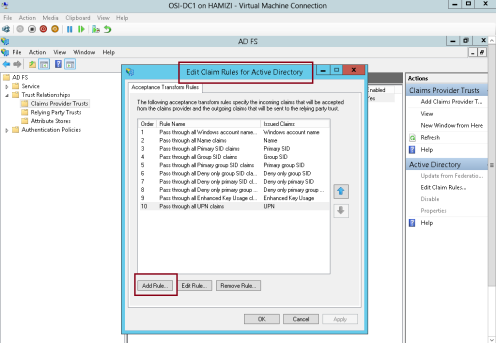
2 – In the Edit Claims Rules for Active Directory interface, on the Acceptance Transform Rules tab, click Add Rule…
3 – In the Claim rule template box, select Send LDAP Attributes as Claims, and then click Next…

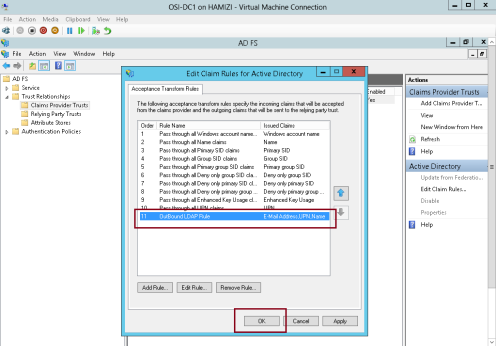
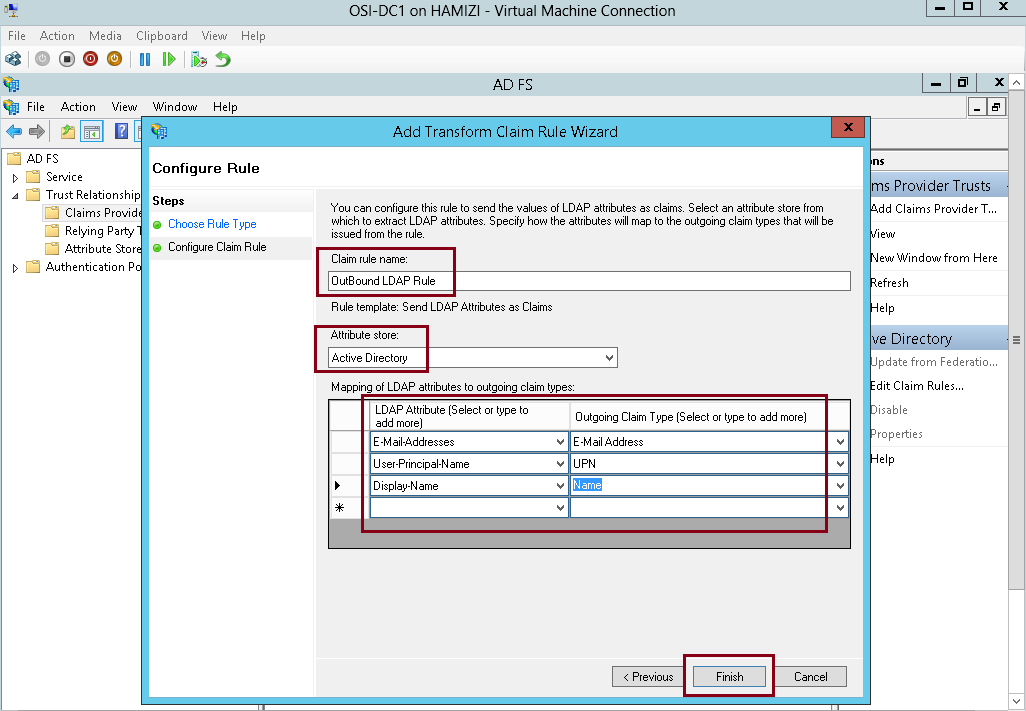
4 – On the Configure Rule interface, in the Claim rule name box, type Outbound LDAP Rule, then in the Attribute Store drop-down list, select Active Directory.
** In the Mapping of LDAP attributes to outgoing claim types section, select the following values and then click Finish:

5 – Then click OK…
6th – Configure the application to trust incoming claims
1 -Switch to SVR1 server, and then open Windows Identity Foundation Federation Utility console….
2 – On the Welcome to the Federation Utility Wizard interface, in the Application configuration location box, type C:\inetpub\wwwroot\AdatumTestApp\web.config for the location of the sample web.config file…
** In the Application URI box, type https://lon-svr1.adatum.com/AdatumTestApp/ to indicate the path to the sample application that will trust the incoming claims from the federation server, and then click Next to continue…

3 – On the Security Token Service page, click Use an existing STS, in the STS WS-Federation metadata document location box, type https://adfs.adatum.com/federationmetadata/2007-06/federationmetadata.xml, and then click Next to continue…

4 – On the STS signing certificate chain validation error interface, click Disable certificate chain validation, and then click Next…

5 – On the Security token encryption interface, click No encryption, and then click Next…

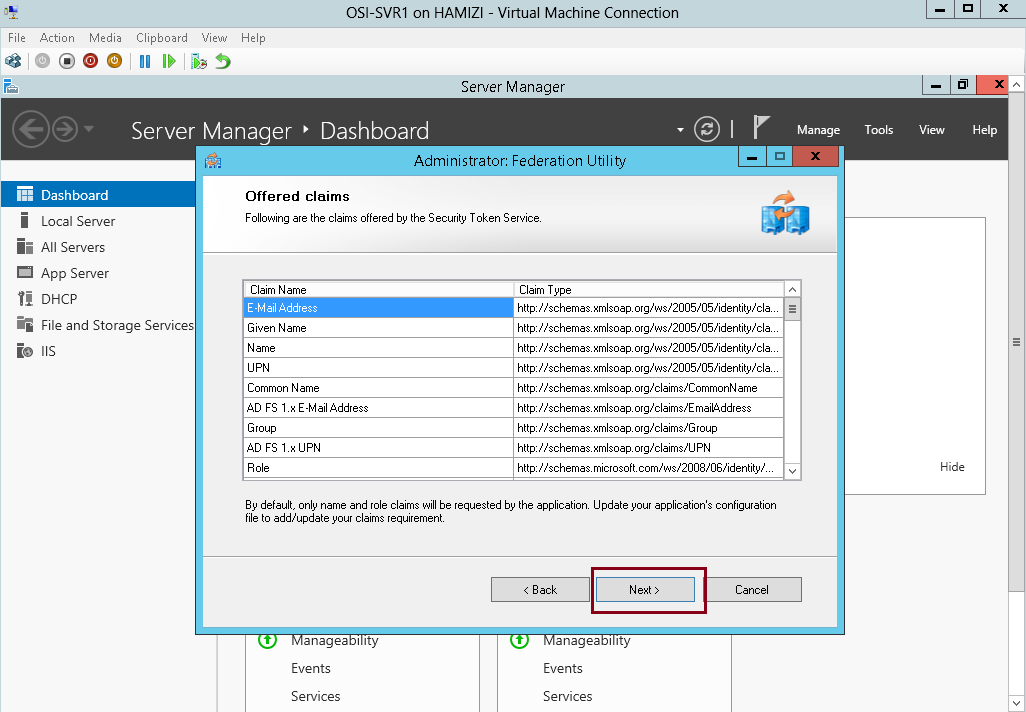
6 – On the Offered claims interface, click Next…

7 – and then click Finish and OK…

7th – Configure a relying-party trust for the claims-aware application
1 – Now switch to DC1 domain server, in the ADFS console, right-click Relying Party Trusts, and then click Add Relying Party Trust…

2 – on the Welcome interface, click Start…

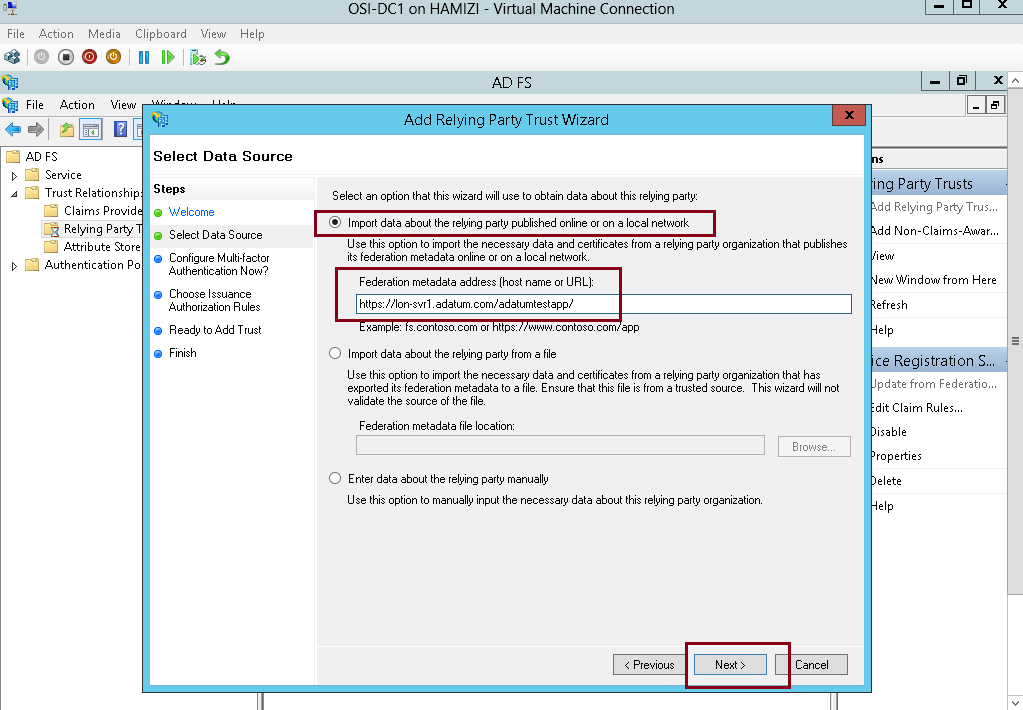
3 – On the Select Data Source interface, click Import data about the relying party published online or on a local network…
** In the Federation Metadata address (host name or URL) box, type https://lonsvr1.adatum.com/adatumtestapp/, and then click Next. This downloads the metadata configured in the previous task…

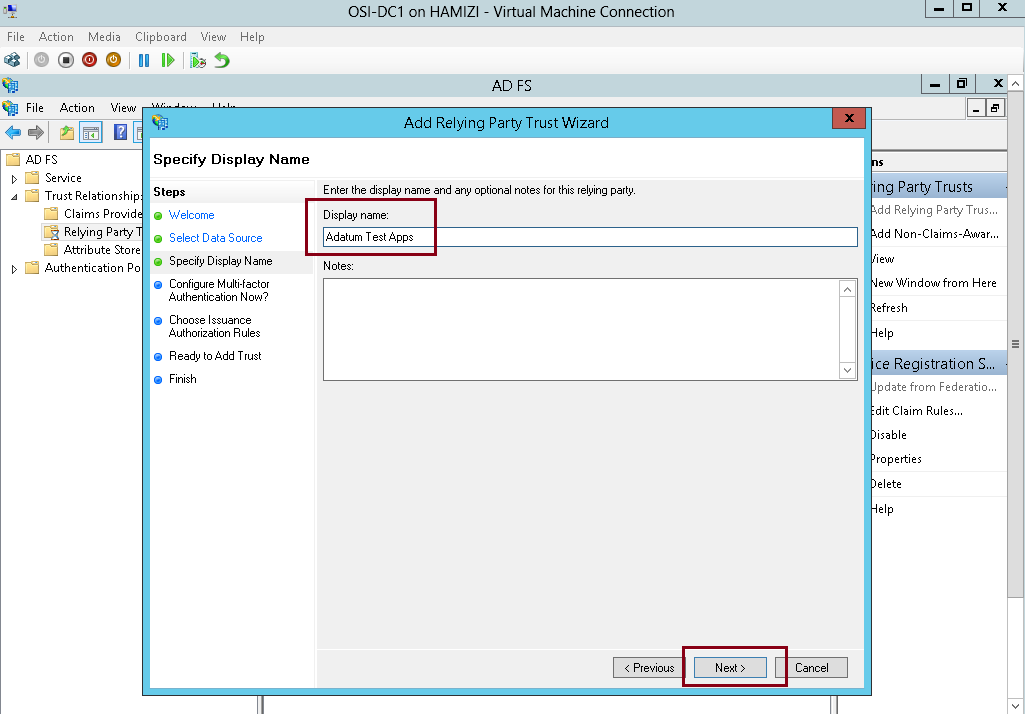
4 – Next in the Display name box, type Adatum Test Apps, and then click Next…

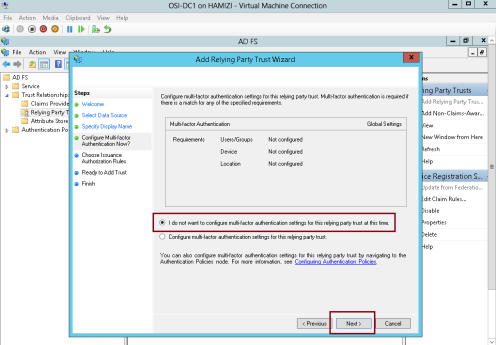
5 – On the Configure Multi-factor Authentication Now interface, click I do not want to configure multifactor
authentication settings for this relying party trust at this time, and then click Next…
6 – On the Choose Issuance Authorization Rules interface, click Permit all users to access this relying party, and then click Next…

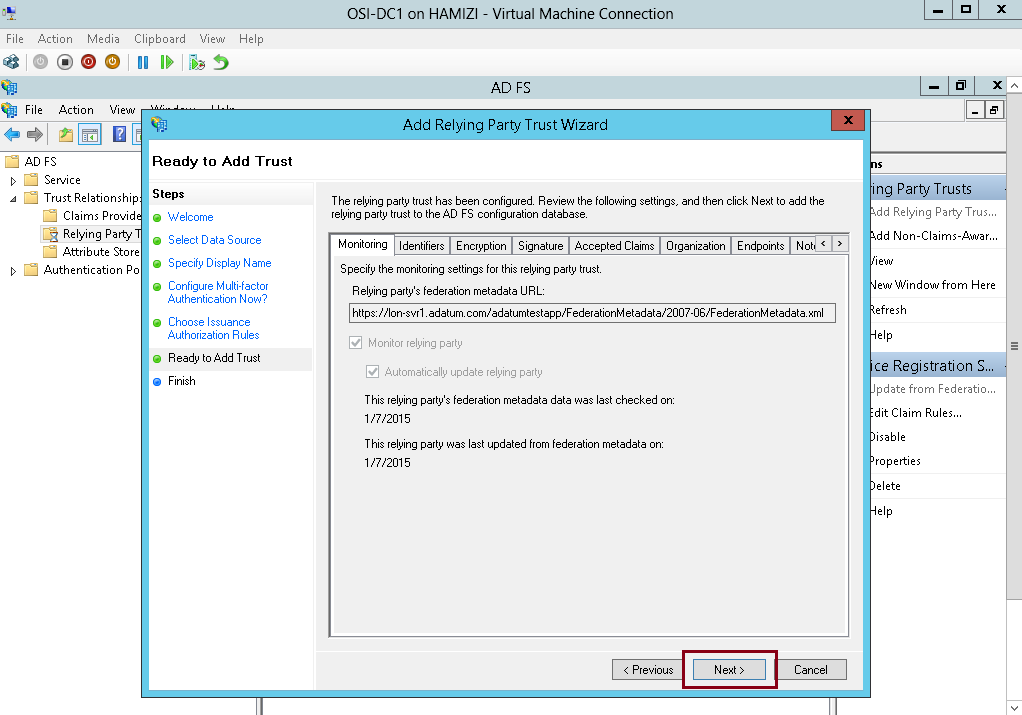
7 – On the Ready to Add Trust interface, click Next…

8 – On the Finish interface, click Close…

8th – Configure claim rules for the relying-party trust
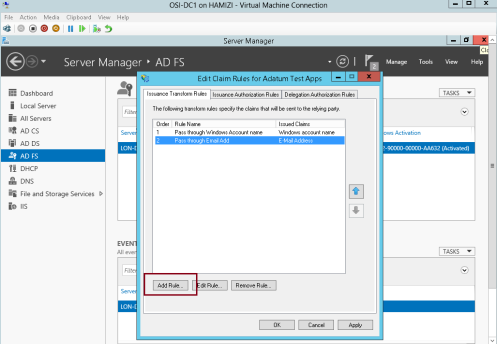
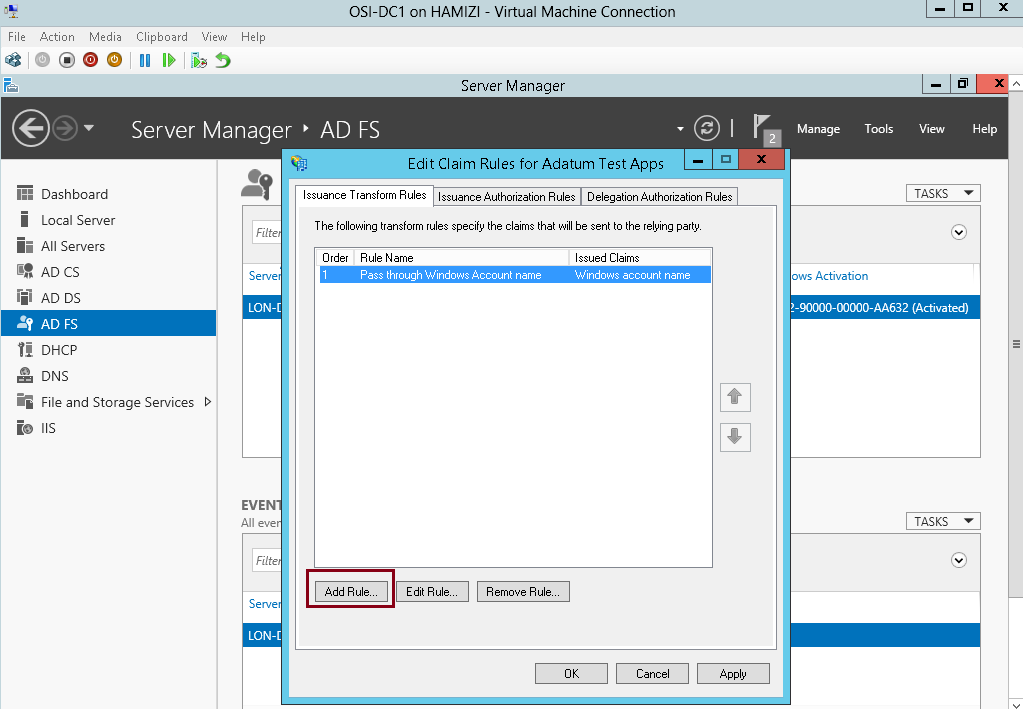
1 – still in DC1 domain server, in the Edit Claim Rules for Adatum Test Apps interface, on the Issuance Transform Rules tab, click Add Rule…

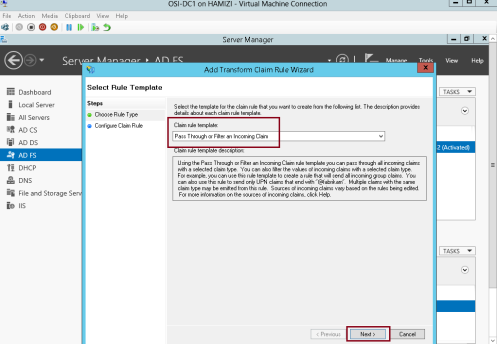
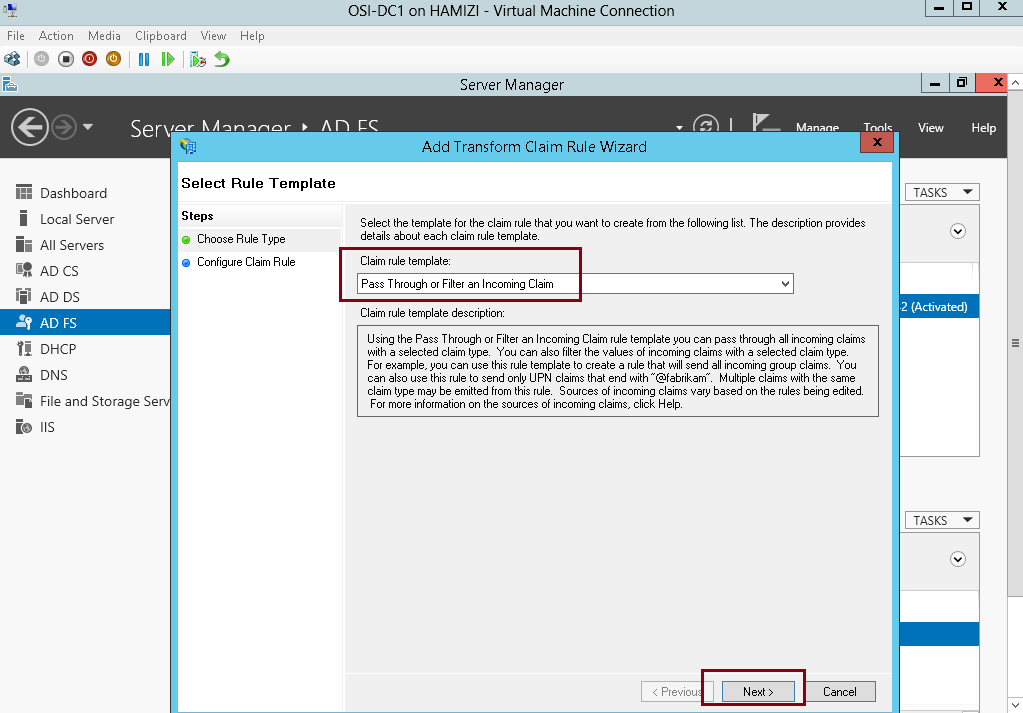
2 – In the Claim rule template box, select Pass Through or Filter an Incoming Claim, and then click Next…
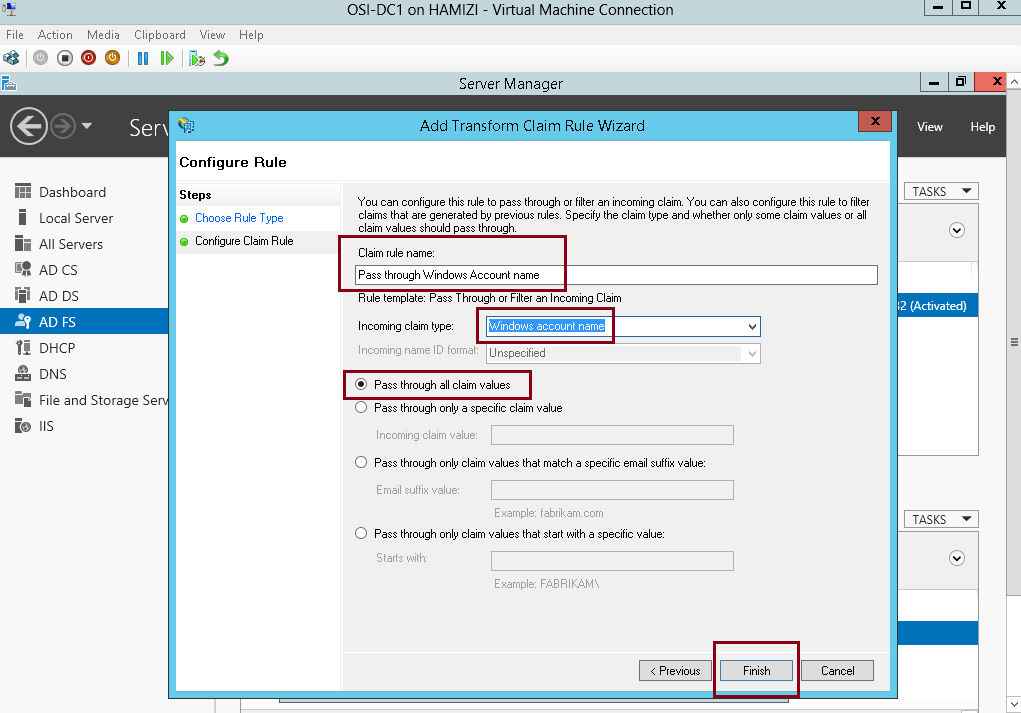
3 – In the Claim rule name box, type Pass through Windows account name…
** In the Incoming claim type drop-down list, click Windows account name, and then click Finish…

4 – On the Issuance Transform Rules tab, click Add Rule…

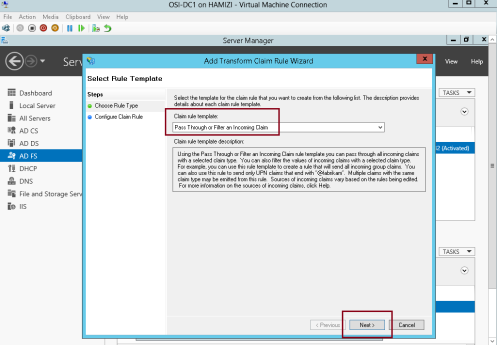
5 – In the Claim rule template box, select Pass Through or Filter an Incoming Claim, and then click Next…

6 – In the Claim rule name box, type Pass through E-Mail Address…
** In the Incoming claim type drop-down list, click E-Mail Address, and then click Finish…

7 – On the Issuance Transform Rules tab, click Add Rule…
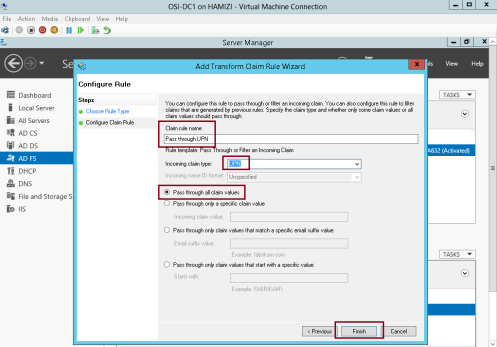
8 – In the Claim rule template box, select Pass Through or Filter an Incoming Claim, and then click Next…

9 – In the Claim rule name box, type Pass through UPN…
** In the Incoming claim type drop-down list, click UPN, and then click Finish…
10 – On the Issuance Transform Rules tab, click Add Rule…

11 – In the Claim rule template box, select Pass Through or Filter an Incoming Claim, and then click Next…
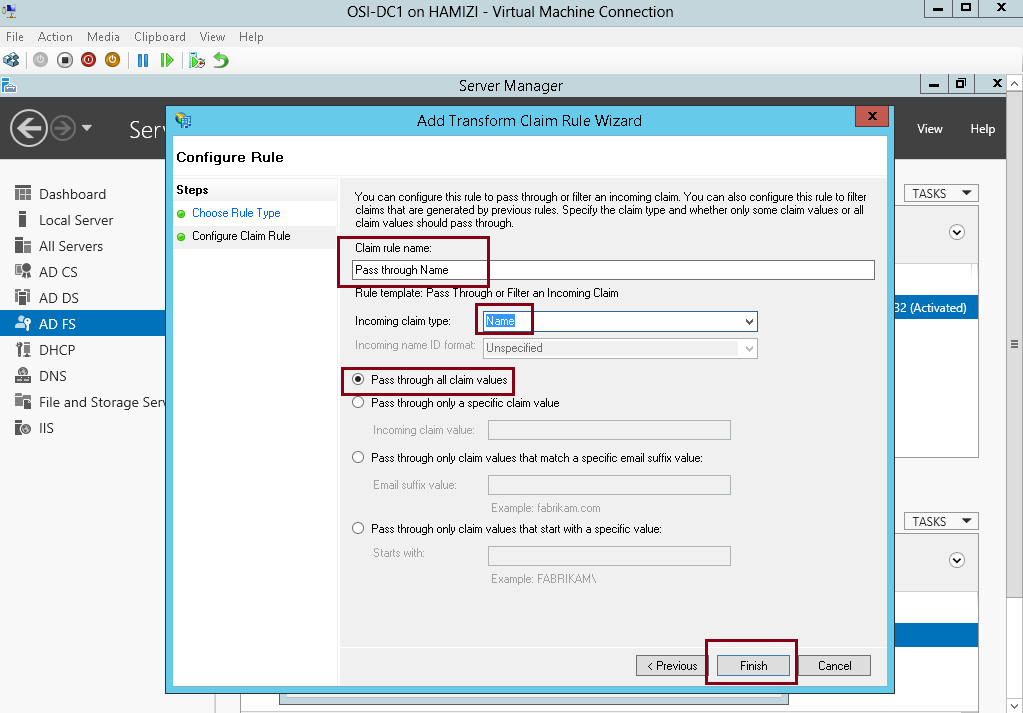
12 – In the Claim rule name box, type Pass through Name…
** In the Incoming claim type drop-down list, click Name, and then click Finish…

13 – Then click OK…

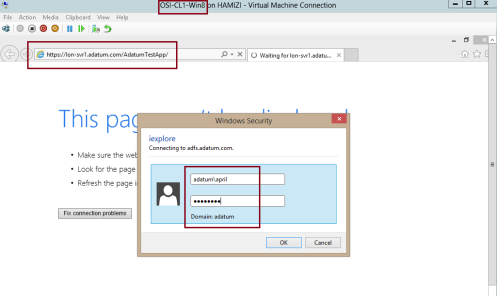
14 – Now switch to Windows 8.1 Client PC, log in as domain user and then open IE, then type https://lon- svr1.adatum.com/AdatumTestApp/…
** Notice that Windows Security window will pop out, then sign in as domain user…
15 – verify that the claim information is displays….

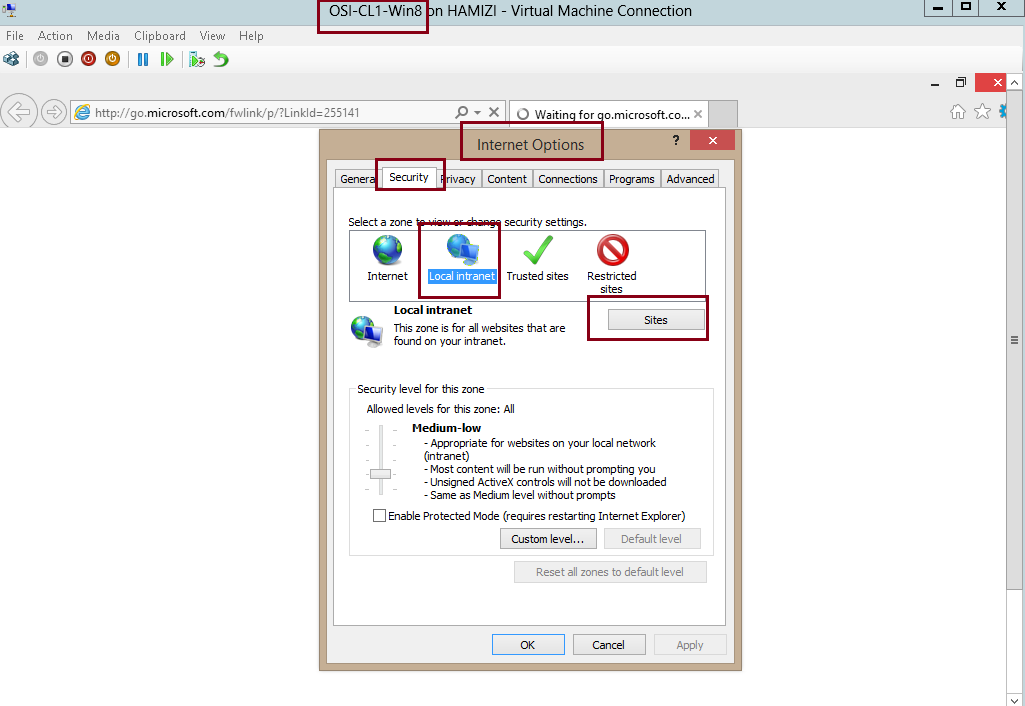
9th – Configure IE to pass local credentials to the application automatically
1 – Still in Windows 8.1 client PC IE, then open Internet Options…
** In the Internet Options Properties interface, click Security tab, click Local intranet, and then click Sites…

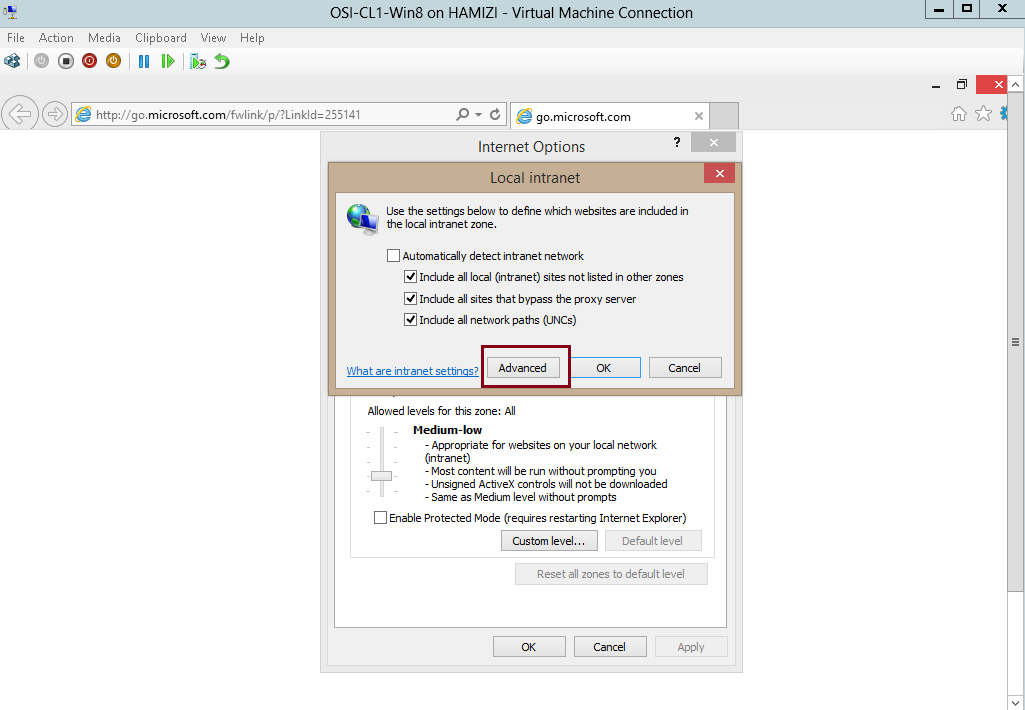
2 – In the Local intranet interface, click Advanced…

3 – In the Local intranet interface, in the Add this website to the zone box, insert https://adfs.adatum.com and https://lon-svr1.adatum.com, and then click Close, and click OK twice…

4 – Then in the IE, type https://lon-svr1.adatum.com/AdatumTestApp/, notice that you were not prompted for credentials…
That’s all for now, we have successfully installed and configured ADFS, and verified that it is functioning by
viewing the FederationMetaData.xml file contents. We also have successfully configured ADFS to support authentication for an application…
With ADFS, your company can manage its own user accounts, and users only have to remember one set of credentials.
However, those credentials can provide access to a variety of applications, which typically are located in different locations.
ADFS is compliant with common Web services standards, thus enabling interoperability with identity federation solutions that other vendors provide.
AD FS addresses a variety of business scenarios where the typical authentication mechanisms used in an organization do not work.
More info & reading : http://technet.microsoft.com/en-us/windowsserver/dd448613.aspx
For this basic ADFS demo, i’m using my previous VM which is my domain controller (DC1), member server (SVR1) and 1 windows 8.1 client PC…
1st – Create a DNS record for AD FS
1 – On Domain controller (DC1) server, open DNS console and add new host…
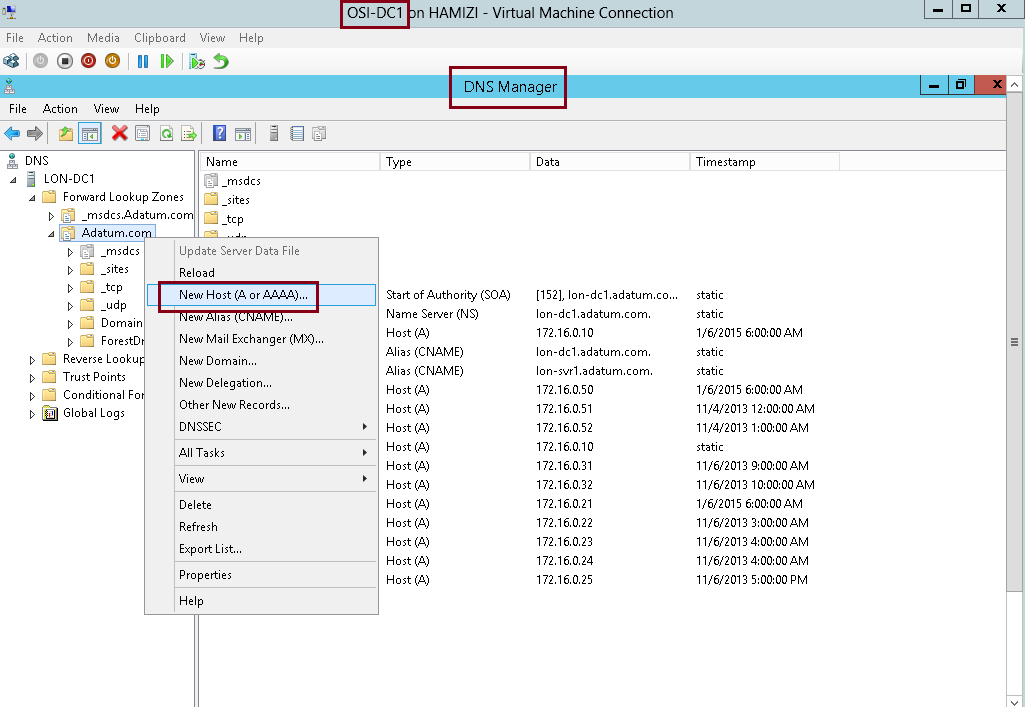
2 – In the New Host box, type adfs, in the IP address box, type 172.16.0.10, and then click Add Host…

3 – Then click OK…

** before we proceed, make sure you create a new AD user called adfsService…
2nd – Install AD FS
1 – Still on the DC1 domain server, open server manager, click Add Roles and Features, proceed the step until you get Select server roles interface, and then click Active Directory Federation Services, then proceed with next…

2 – On the Select features interface, click Next…
3 – On the Active Directory Federation Services (AD FS) interface, click Next…

4 – then click Install…

5 – Once the installation completed, click Configure the federation service on this server…

3rd – Configure AD FS
1 – on the Welcome interface, click Create the first federation server in a federation server farm, and then click Next…

2 – On the Connect to Active Directory Domain Services interface, proceed with Next…
3 – On the Specify Service Properties interface, in the SSL Certificate box, select adfs.adatum.com…
** In the Federation Service Display box, type Adatum Organization, and then click Next…

4 – On the Specify Service Account interface, click Use an existing domain user account or group Managed Service Account and then choose adfs user that you created previously, and then click next…
5 – On the Specify Configuration Database interface, click Create a database on this server using Windows Internal Database, and then click Next…

6 – On the Review Options interface, click Next…

7 – On the Pre-requisite Checks interface, verify that all prerequisite passed and then click Configure…

8 – On the Results interface, click Close…
** Please take note that adfs.adatum.com certificate was preconfigured for this task. In your own environment, you need to obtain this certificate.

9 – to verify the ADFS functionality, log in to Windows 8.1 client PC as a AD user, and the open IE and type : https://adfs.adatum.com/federationmetadata/2007-06/federationmetadata.xml, and then verify that the file loads successfully…
4th – Configure a certificate for the application
1 – Now switch to SVR1 server and open Internet Information Services (IIS) Manager and then open Server
Certificates…

2 – then click Create Domain Certificate…
3 – In the Create Certificate interface on the Distinguished Name Properties, enter the following information (please refer to snapshot), and then click Next…

4 – On the Online Certification Authority interface, click Select…

5 – click AdatumCA, and then click OK…

6 – On the Online Certification Authority interface, in the Friendly name box, type Adatum Apps Certificate, and then click Finish…

7 – In IIS Manager, expand Sites, click Default Web Site, and then click Bindings…

8 – In the Site Bindings interface, click Add…

9 – In the Add Site Binding interface, in the Type box, select https, then in the SSL certificate box, select Adatum Apps Certificate, and then click OK…

5th – Configure the Active Directory claims-provider trust
1 – Switch to DC1 server, and open AD FS Management, expand Trust Relationships, and then click Claims Provider
Trusts, in the middle pane, right-click Active Directory, and then click Edit Claim Rules…

2 – In the Edit Claims Rules for Active Directory interface, on the Acceptance Transform Rules tab, click Add Rule…

3 – In the Claim rule template box, select Send LDAP Attributes as Claims, and then click Next…

4 – On the Configure Rule interface, in the Claim rule name box, type Outbound LDAP Rule, then in the Attribute Store drop-down list, select Active Directory.
** In the Mapping of LDAP attributes to outgoing claim types section, select the following values and then click Finish:
5 – Then click OK…

6th – Configure the application to trust incoming claims
1 -Switch to SVR1 server, and then open Windows Identity Foundation Federation Utility console….
2 – On the Welcome to the Federation Utility Wizard interface, in the Application configuration location box, type C:\inetpub\wwwroot\AdatumTestApp\web.config for the location of the sample web.config file…
** In the Application URI box, type https://lon-svr1.adatum.com/AdatumTestApp/ to indicate the path to the sample application that will trust the incoming claims from the federation server, and then click Next to continue…

3 – On the Security Token Service page, click Use an existing STS, in the STS WS-Federation metadata document location box, type https://adfs.adatum.com/federationmetadata/2007-06/federationmetadata.xml, and then click Next to continue…

4 – On the STS signing certificate chain validation error interface, click Disable certificate chain validation, and then click Next…

5 – On the Security token encryption interface, click No encryption, and then click Next…

6 – On the Offered claims interface, click Next…
7 – and then click Finish and OK…

7th – Configure a relying-party trust for the claims-aware application
1 – Now switch to DC1 domain server, in the ADFS console, right-click Relying Party Trusts, and then click Add Relying Party Trust…

2 – on the Welcome interface, click Start…

3 – On the Select Data Source interface, click Import data about the relying party published online or on a local network…
** In the Federation Metadata address (host name or URL) box, type https://lonsvr1.adatum.com/adatumtestapp/, and then click Next. This downloads the metadata configured in the previous task…
4 – Next in the Display name box, type Adatum Test Apps, and then click Next…
5 – On the Configure Multi-factor Authentication Now interface, click I do not want to configure multifactor
authentication settings for this relying party trust at this time, and then click Next…

6 – On the Choose Issuance Authorization Rules interface, click Permit all users to access this relying party, and then click Next…

7 – On the Ready to Add Trust interface, click Next…
8 – On the Finish interface, click Close…

8th – Configure claim rules for the relying-party trust
1 – still in DC1 domain server, in the Edit Claim Rules for Adatum Test Apps interface, on the Issuance Transform Rules tab, click Add Rule…

2 – In the Claim rule template box, select Pass Through or Filter an Incoming Claim, and then click Next…

3 – In the Claim rule name box, type Pass through Windows account name…
** In the Incoming claim type drop-down list, click Windows account name, and then click Finish…
4 – On the Issuance Transform Rules tab, click Add Rule…
5 – In the Claim rule template box, select Pass Through or Filter an Incoming Claim, and then click Next…
6 – In the Claim rule name box, type Pass through E-Mail Address…
** In the Incoming claim type drop-down list, click E-Mail Address, and then click Finish…

7 – On the Issuance Transform Rules tab, click Add Rule…

8 – In the Claim rule template box, select Pass Through or Filter an Incoming Claim, and then click Next…

9 – In the Claim rule name box, type Pass through UPN…
** In the Incoming claim type drop-down list, click UPN, and then click Finish…

10 – On the Issuance Transform Rules tab, click Add Rule…

11 – In the Claim rule template box, select Pass Through or Filter an Incoming Claim, and then click Next…

12 – In the Claim rule name box, type Pass through Name…
** In the Incoming claim type drop-down list, click Name, and then click Finish…
13 – Then click OK…

14 – Now switch to Windows 8.1 Client PC, log in as domain user and then open IE, then type https://lon- svr1.adatum.com/AdatumTestApp/…
** Notice that Windows Security window will pop out, then sign in as domain user…

15 – verify that the claim information is displays….

9th – Configure IE to pass local credentials to the application automatically
1 – Still in Windows 8.1 client PC IE, then open Internet Options…
** In the Internet Options Properties interface, click Security tab, click Local intranet, and then click Sites…
2 – In the Local intranet interface, click Advanced…
3 – In the Local intranet interface, in the Add this website to the zone box, insert https://adfs.adatum.com and https://lon-svr1.adatum.com, and then click Close, and click OK twice…

4 – Then in the IE, type https://lon-svr1.adatum.com/AdatumTestApp/, notice that you were not prompted for credentials…
That’s all for now, we have successfully installed and configured ADFS, and verified that it is functioning by
viewing the FederationMetaData.xml file contents. We also have successfully configured ADFS to support authentication for an application…
No comments:
Post a Comment