Overview
TheIIS defines two types of authorization rules, Allow rules and Deny rules:
- Allow rules let you define the user accounts or user groups that can access a site, an application, or all the sites on a server.
- Deny rules let you define the user accounts or user groups that cannot access a site, an application, or all the sites on a server.
Compatibility
| Version | Notes |
|---|---|
| IIS 8.5 | The |
| IIS 8.0 | The |
| IIS 7.5 | The |
| IIS 7.0 | The |
| IIS 6.0 | The |
Setup
To support and configure authorization for sites and applications on your Web server, you must install the URL authorization module. To do so, use the following steps.Windows Server 2012 or Windows Server 2012 R2
- On the taskbar, click Server Manager.
- In Server Manager, click the Manage menu, and then click Add Roles and Features.
- In the Add Roles and Features wizard, click Next. Select the installation type and click Next. Select the destination server and click Next.
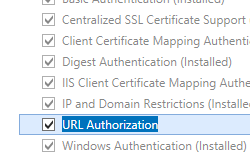
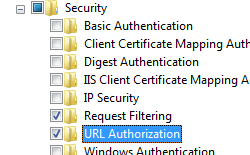
- On the Server Roles page, expand Web Server (IIS), expand Web Server, expand Security, and then select URL Authorization. Click Next.
 .
.
- On the Select features page, click Next.
- On the Confirm installation selections page, click Install.
- On the Results page, click Close.

Windows 8 or Windows 8.1
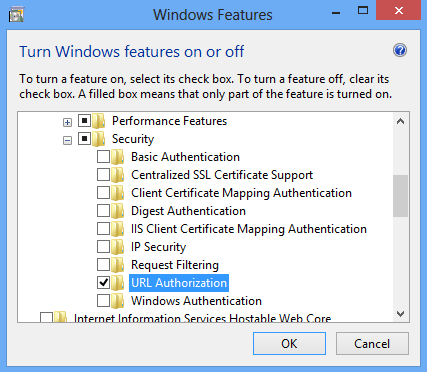
- On the Start screen, move the pointer all the way to the lower left corner, right-click the Start button, and then click Control Panel.
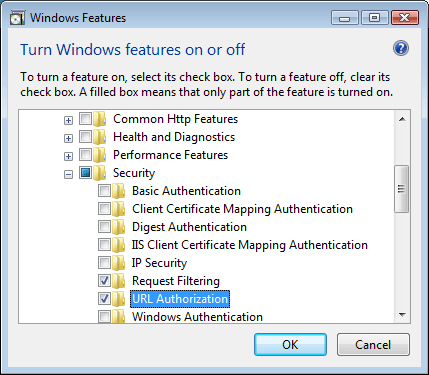
- In Control Panel, click Programs and Features, and then click Turn Windows features on or off.
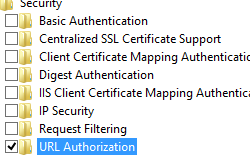
- Expand Internet Information Services, expand World Wide Web Services, expand Security, and then select URL Authorization.
- Click OK.
- Click Close.
Windows Server 2008 or Windows Server 2008 R2
- On the taskbar, click Start, point to Administrative Tools, and then click Server Manager.
- In the Server Manager hierarchy pane, expand Roles, and then click Web Server (IIS).
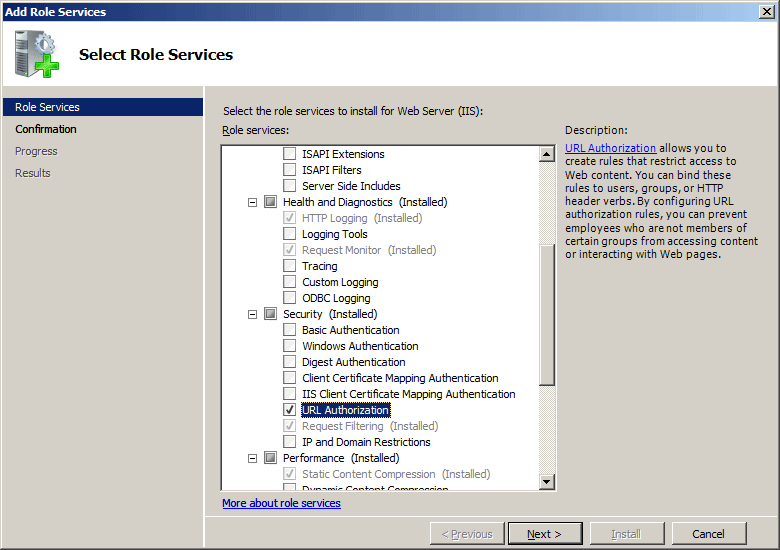
- In the Web Server (IIS) pane, scroll to the Role Services section, and then click Add Role Services.
- On the Select Role Services page of the Add Role Services Wizard, select URL Authorization, and then click Next.

- On the Confirm Installation Selections page, click Install.
- On the Results page, click Close.
Windows Vista or Windows 7
- On the taskbar, click Start, and then click Control Panel.
- In Control Panel, click Programs and Features, and then click Turn Windows Features on or off.
- Expand Internet Information Services, then select URL Authorization, and then click OK.
How To
How to add an authorization rule
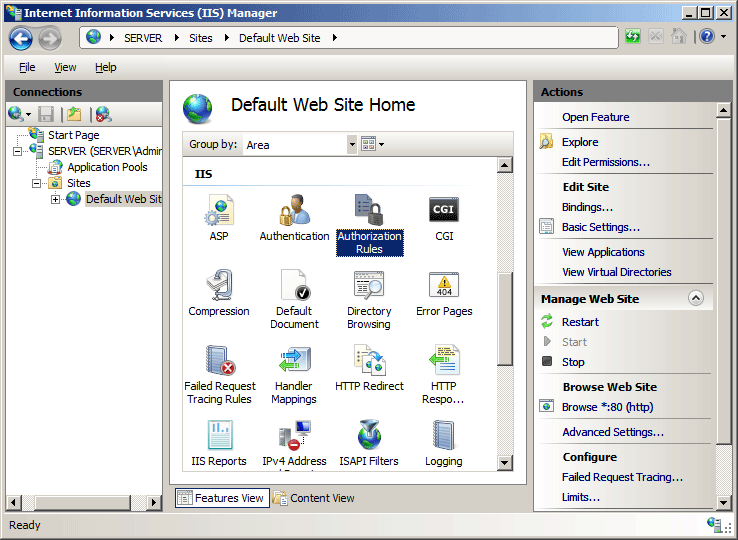
- Open Internet Information Services (IIS) Manager:
- If you are using Windows Server 2012 or Windows Server 2012 R2:
- On the taskbar, click Server Manager, click Tools, and then click Internet Information Services (IIS) Manager.
- If you are using Windows 8 or Windows 8.1:
- Hold down the Windows key, press the letter X, and then click Control Panel.
- Click Administrative Tools, and then double-click Internet Information Services (IIS) Manager.
- If you are using Windows Server 2008 or Windows Server 2008 R2:
- On the taskbar, click Start, point to Administrative Tools, and then click Internet Information Services (IIS) Manager.
- If you are using Windows Vista or Windows 7:
- On the taskbar, click Start, and then click Control Panel.
- Double-click Administrative Tools, and then double-click Internet Information Services (IIS) Manager.
- If you are using Windows Server 2012 or Windows Server 2012 R2:
- In the Connections pane, expand the server name, expand Sites, and then navigate to the site or application on which you want to configure authorization.
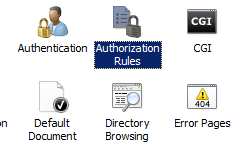
- In the Home pane, double-click Authorization Rules.
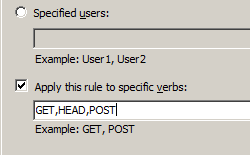
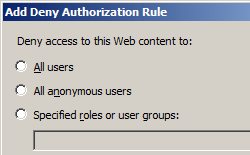
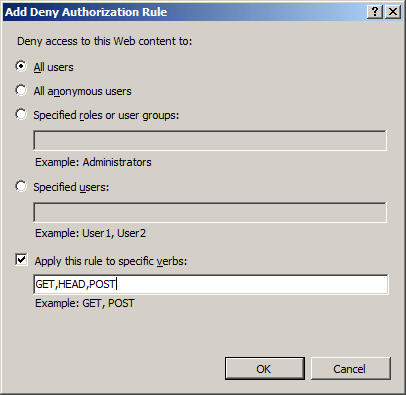
- To add a new authorization rule, in the Actions pane click Add Allow Rule... or Add Deny Rule...
- Apply the authorization settings needed for your site or application, and then click OK. For example:
- Example #1: Adding an Allow rule for all users for specific HTTP verbs:
- Example #2: Adding a Deny rule for a specific user for all HTTP verbs:
- Example #1: Adding an Allow rule for all users for specific HTTP verbs:

Configuration
You can configure theYou can set default authorization rules for the entire server by configuring authorization rules at the server level. You can remove, clear, or override these rules by configuring more specific rules for your sites or applications.
Attributes
| Attribute | Description |
|---|---|
bypassLoginPages |
Optional Boolean attribute. Specifies whether to skip authorization check for the page specified as the login page for Forms authentication. This enables unauthenticated users to access the login page to log on. The default value is true. |
Child Elements
| Element | Description |
|---|---|
add |
Optional element. Adds an authorization rule to the collection of authorization rules. |
remove |
Optional element. Removes a reference to an authorization rule to the collection of authorization rules. |
clear |
Optional element. Removes all references to authorization rules from the collection of authorization rules. |
Configuration Sample
The following configuration example, when included in a Web.config file, removes the default IIS authorization settings, which allows all users access to Web site or application content. It then configures an authorization rule that allows only users with administrator privileges to access the content.users="*" roles="" verbs="" /> accessType="Allow" users="" roles="Administrators" />
Sample Code
The following examples add an allow authorization rule that allows users in the administrators group to access a Web site named Contoso.AppCmd.exe
appcmd.exe set config "Contoso" -section:system.webServer/security/authorization /+"[accessType='Allow',roles='administrators']"Note: You can optionally set the commit parameter to
apphost
when using AppCmd.exe to configure these settings. This commits the
configuration settings to the appropriate location section in the
ApplicationHost.config file instead of a Web.config file.C#
using System;
using System.Text;
using Microsoft.Web.Administration;

internal static class Sample
{
   private static void Main()
   {
      using (ServerManager serverManager = new ServerManager())
      {
         Configuration config = serverManager.GetWebConfiguration("Contoso");
         ConfigurationSection authorizationSection = config.GetSection("system.webServer/security/authorization");
         ConfigurationElementCollection authorizationCollection = authorizationSection.GetCollection();

         ConfigurationElement addElement = authorizationCollection.CreateElement("add");
         addElement["accessType"] = @"Allow";
         addElement["roles"] = @"administrators";
         authorizationCollection.Add(addElement);

         serverManager.CommitChanges();
      }
   }
}
VB.NET
Imports System
Imports System.Text
Imports Microsoft.Web.Administration

Module Sample
   Sub Main()
      Dim serverManager As ServerManager = New ServerManager
      Dim config As Configuration = serverManager.GetWebConfiguration("Contoso")
      Dim authorizationSection As ConfigurationSection = config.GetSection("system.webServer/security/authorization")
      Dim authorizationCollection As ConfigurationElementCollection = authorizationSection.GetCollection
      Dim addElement As ConfigurationElement = authorizationCollection.CreateElement("add")
      addElement("accessType") = "Allow"
      addElement("roles") = "administrators"
      authorizationCollection.Add(addElement)
      serverManager.CommitChanges()
   End Sub
End Module
JavaScript
var adminManager = new ActiveXObject('Microsoft.ApplicationHost.WritableAdminManager');
adminManager.CommitPath = "MACHINE/WEBROOT/APPHOST/Contoso";
var authorizationSection = adminManager.GetAdminSection("system.webServer/security/authorization", "MACHINE/WEBROOT/APPHOST/Contoso");
var authorizationCollection = authorizationSection.Collection;

var addElement = authorizationCollection.CreateNewElement("add");
addElement.Properties.Item("accessType").Value = "Allow";
addElement.Properties.Item("roles").Value = "administrators";
authorizationCollection.AddElement(addElement);

adminManager.CommitChanges();
VBScript
Set adminManager = CreateObject("Microsoft.ApplicationHost.WritableAdminManager")
adminManager.CommitPath = "MACHINE/WEBROOT/APPHOST/Contoso"
Set authorizationSection = adminManager.GetAdminSection("system.webServer/security/authorization", "MACHINE/WEBROOT/APPHOST/Contoso")
Set authorizationCollection = authorizationSection.Collection

Set addElement = authorizationCollection.CreateNewElement("add")
addElement.Properties.Item("accessType").Value = "Allow"
addElement.Properties.Item("roles").Value = "administrators"
authorizationCollection.AddElement(addElement)

adminManager.CommitChanges()
No comments:
Post a Comment