Showing posts with label VMWare. Show all posts

Tuesday, February 15, 2022

Log Disk Exhaustion Error VMWare vCenter

vCenter Server /storage/log filling up due to localhost_access.log and catalina.log in sso and lookupsvc log directories (85475)


 Symptoms
  1. /storage/log is filling up
  2. You are receiving constant alerts in vCenter Server that /storage/log is above 80%
  3. The output of this command "du -hSx /storage/log |sort -rh |head -30" returns the following directories as the ones using more space:
    • /var/log/vmware/sso/tomcat
    • /var/log/vmware/eam/web
    • /var/log/vmware/lookupsvc/tomcat
    • /var/log/vmware/lookupsvc
  4. Under those directories there are too many localhost_access*.log and catalina*.log files.
  5. localhost_access*.log and catalina*.log are not compressed
 Cause
There is no proper log rotation and compression being performed on these files and it can start filling /storage/log
 Resolution
Currently there is no resolution. VMware is aware of this issue and will fix it in a future release.
 Workaround
Remember: Always take a snapshot of your vCenter Server whenever you are going to make any changes.

1. Copy the files in the attached "configs.zip" file in this KB to the respective file listed below in your vCenter Server Appliance:

configs.zip                 >  Your vCenter Server
-----------                    -------------------
SSO_server.xml              >  /usr/lib/vmware-sso/vmware-sts/conf/server.xml
SSO_logging.properties      >  /usr/lib/vmware-sso/vmware-sts/conf/logging.properties
LOOKSVC_server.xml          >  /usr/lib/vmware-lookupsvc/conf/server.xml
LOOKSVC_logging.properties  >  /usr/lib/vmware-lookupsvc/conf/logging.properties


2. Restart the vmware-stsd and lookupsvc services

service-control --stop vmware-stsd && service-control --start vmware-stsd
service-control --stop lookupsvc && service-control --start lookupsvc


3. Copy "tomcat_compress.cron" located in the attached file "tomcat_compress.zip" in this KB to /etc/cron.d on your vCenter Server appliance.


Saturday, July 10, 2021

VMWare: Changing the thick or thin provisioning of a virtual disk

 Purpose

This article provides steps to change the provisioning of a virtual disk from thick to thin, or from thin to thick. The procedure uses the vSphere Client and vCenter Server to perform this task.
Resolution
Caution: Before following these procedures, VMware recommends that you have a valid backup of the virtual machine and enough space to convert the virtual machine's disk(s) from thin to thick.

To change vmdk from Thin to Thick provisioning 

To change the provisioning of a virtual machine base disk from thin to thick from the Datastore Browser:
  1. Power off the virtual machine.
  2. In vSphere Client, right-click the virtual machine in the inventory.
  3. Click Edit Settings to display the Virtual Machine Properties dialog box.
  4. Select the appropriate hard disk in the Hardware list.
Note: The Disk Provisioning Type section on the right displays either Thin Provision or Thick Provision.

vmdk tick to thin 
  1. Click Cancel to exit from Virtual Machine Properties dialog box.
  2. Navigate to the datastore where the VM/ VM disk resides that was identified in Step 4 under Files
vmdk thin to thick
  1. Select the disk in question, and in the status bar above, you should find the Inflate option. The Inflate option converts the disk to thick provisioned.
vmware convert thick to thin
 
 
  1. Once you've selected the inflate option, you should be seeing a task getting created for the vmdk inflation at the bottom in the Recent Tasks tab. This task usually takes sometime to complete depending on the performance of the array. 
  2. After the inflation task is completed, if the VM in question is not reflecting the change, reload the .vmx file. For more information, see Reloading a vmx file without removing the virtual machine from inventory (1026043).
Notes:
  • If the Inflate option is grayed out, it indicates that the virtual machine is not powered off or that it is not thin provisioned.
  • There should be no snapshots and the conversion is performed on the base disk.

To change vmdk from Thick to Thin provisioning 

To convert a virtual machine base disk from thick to thin provisioning by changing the datastore and performing storage vMotion:
 
Note: This process requires more than one datastore. If only a single datastore exists, you can clone the virtual machine to a destination machine with thin provisioned disks instead of migrating.
  1. Right-click the virtual machine and select Migrate.
  2. Select Change storage only and click Next.
vmware convert thin to thick
 
  1. In the next window, select the option configure per disk.
thin to thick provisioning
  1. Select the disk in question which needs to undergo the modification.
  2. Under Storage category select the destination datastore and under the Disk Format option select Thin Provision.
Thin Provision
  1. Validate the required VM Storage Policy and click Next.
  2. Review the information on the Review Selections page and click Finish.

    Alternatively, virtual machine disks can be cloned to create new Thick or Thin provisioned VMDKs. For more information, see Cloning and converting virtual machine disks with vmkfstools (1028042).

    Monday, August 12, 2019

    How To Upgrade ESXi 6.x to 6.7 via ISO

    This is to upgrade VMware ESXi 6.x to 6.7 via ISO image. There are several ways of upgrading standalone ESXi hosts, and via the ISO image it’s just so simple that I wanted to show this for the newcomers and people who just starting with VMware technology.
    VMware ESXi is one of the most popular hypervisors around. You don’t have to fear of upgrades, especially when you know that you can revert back an upgrade. Yes, in case you having problems after upgrading, you can simply hold SHIFT + R and chose to roll back.
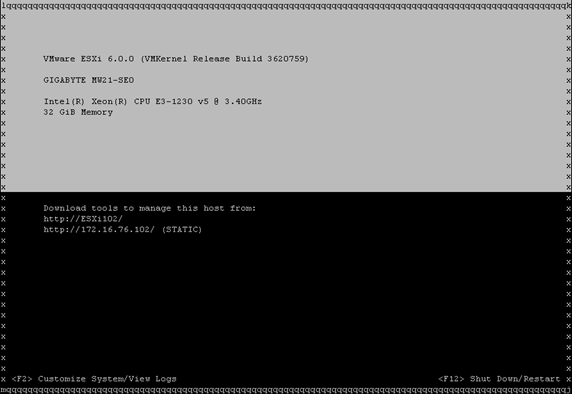
    Here is a screenshot from the UI. 

    Upgrade ESXi 6.x to 6.7 via ISO – The steps

    Step 1 – Download the ESXi 6.7 Installation ISO from VMware and use clean CD-ROM to burn the ISO to the media and prepare ESXi 6.7 CD-ROM.
    Note: If you have a server which supports remote connections such as ILO, iDrak or iPMI, you don’t have to use physical CD-ROM. You can attach the ISO image directly and boot up your host.
    Step 2 – Go to the BIOS of your ESXi host and set the boot sequence to boot from CD-ROM first. Like this, the server will boot from the CD-ROM. Boot up your server, follow the installer’s instructions.

    NOTE: You’ll need to know the root password of the previous ESXi installation. If not, you won’t be able to upgrade. I mean, it’s quite logical, but we had some questions like “what if we do not have root password”…..
    The installer continues, and then, when you’ll be at the page where the installer founds an existing VMFS partition, leave the first option selected. It’s the “Upgrade ESXi, preserve VMFS datastore”. This is the option we need.

    Hit OK and let the installer to upgrade your host.
    After, you’ll get a prompt to remove the ISO and reboot to finish the upgrade process. The ESXi will now boot and the new ESXi 6.7 will get loaded.

    The whole process is very straightforward and simple to use.
    For installation where you have managed ESXi hosts by a vCenter server, you might want to use other methods of an upgrade, but we will detail them in another post. This method is useful when you have a single or just a few standalone ESXi hosts to upgrade. Not dozens or hundreds.
    After the upgrade finished you can test the new HTML5 host client which brought significant improvements for VM and host management. I’m sure you know, but folks coming from earlier versions of ESXi and still perhaps using the old vSphere Windows client, might not know.
    Simply connect to your host via IP address or FQDN, like this:
    https://IP_or_FQDN/ui
    To get to the login screen and the version of the ESXi.

    Wrap Up:
    This method is simple and effective for upgrading standalone ESXi hosts. You still keep a possibility to revert back in case something goes wrong. For standalone ESXi, you obviously have to shut down your running VMs before an upgrade.
    Note that at the moment, VMware does not supports upgrades from ESXi 6.5U2 so if you’re on ESXi 6.5 do not install the U2 which has been released recently, but rather wait for an upcoming patch.

    Determining detailed build number information for VMware hosts (1012514)

    Details
    In some cases, after patches have been installed on an ESX host, different build numbers are reported for different components. This article provides details of the build information for 4.0.x and newer hosts.

    For information on ESX 3.0x or ESX 3.5.x hosts, see Determining detailed build number information for VMware ESX 3.0.x and 3.5.x hosts (1001179).
    Solution
    VMware ESX hosts are patched according to a model where each patch bundle only updates a few components of the ESX installation at a time. Not all components of the installation are upgraded during each patch installation. When a patch is applied, the build number of the updated components changes. As a result, the ESX installation can have different components at different build numbers, depending upon which patch bundles have been applied.
    You can view the build number for different components of upgraded versions of ESX 4.0.x. This article provides instructions on how to determine the build number of:
    For more information on how to determine the build number of other VMware products, see Determining VMware Software Version and Build Number (392).

    To determine the system level of a host:

    Note: This displays the build number of the latest update applied (for example, ESX 4.0.0 Update 1):
    1. Log in to the ESX service console or locally to the ESXi host.
    2. In the command prompt, run the command:

      #vmware -l

      You see an output similar to:

      #VMware ESX 4.0.0 Update 1


      The system level base installation of the ESX host will be displayed in the query output. This is the system level with no updates applied.

    To determine the build number of a host:

    Note: This displays the build number of ESX. The build number for ESX changes for any GA (general availability) or update release (like ESX 4.0 Update 1). Because patch releases do not deliver a vmware-esx-vmware-release rpm, they do not affect the build number displayed by vmware -v.
    1. Log in to the ESX service console or locally to the ESXi host.
    2. In the command prompt, run the command:

      #vmware -v

      You see an output similar to:

      #VMware ESX 4.0.0 build-208167

    To determine the patches or updates applied on the ESX host:

    1. Log in to the ESX service console.
    2. In the command prompt, run the command:

      #esxupdate query
      Lines in the output indicate the names and of patches that might have been applied after the original installation. Typical output is similar to:

      ----Bulletin ID---- -----Installed----- -------------Summary-------------
      ESX400-200906401-BG 2009-07-08T18:02:49 Updates VMX
      ESX400-200906412-BG 2009-07-08T18:02:49 Updates esxupdate
      ESX400-200906404-BG 2009-07-08T18:02:49 Updates CIM

    To view the build numbers of all RPMs currently installed on the ESX host:

    1. Log in to the ESX service console.
    2. In the command prompt, type:

      rpm -qa | grep -i vmware
      This method reports build numbers for all ESX components (RPMs) including VMX, host agent, VMkernel, drivers, and so on.

    To view the current build number of the host agent component:

    1. Log in to the ESX host using the VI Client.
    2. Choose Help > About Vmware vSphere

      Note: In ESX 4.0, the packages are called VIBs (vSphere Installation Bundle). The VIB name contains details about the RPMs, including the versions.

    To view the build numbers of RPMs and VIB details contained in a patch bundle before it is installed:

    1. Download the patch bundle zip files as described in the patch bundle installation instructions.
    2. Before installing the patch, change to the directory that you use as your esxupdate repository. For example, if your repository is located at /var/updates, type:

      #cd /var/updates
    3. In the command prompt, type:

      #esxupdate --bundle patchbundlename.zip info

      Where patchbundlename represents the name of patch bundle.

    To view the build numbers of RPMs and VIB details contained in a patch bundle after it is installed:

    1. Log in to the ESX Server service console.
    2. In the command prompt, type:

      # esxupdate info


      This command lists all the VIBs.

    To view the build numbers of RPMs in a specific bulletin contained in a patch bundle after it is installed:

    1. Log in to the ESX Server service console.

      In the command prompt, type:

      # esxupdate info -b bulletinname

      Where bulletinname represents the name of the bulletin you are reviewing, such as ESX400-200906413-BG.
    Sample output for the command: esxupdate info -b bulletinname:


    Id
    - ESX400-200906413-BG
    Releasedate
    - 2009-07-09T00:00:00-08:00
    Vendor
    - VMware, Inc.
    Summary
    - Updates vmkernel iSCSI Driver
    Severity
    - critical
    Category
    - critical
    Installdate
    - 2009-07-02T16:25:56.709691+05:30
    Description
    - This patch fixes an issue where iSCSI targets might disappear during controller fault or failover of an EqualLogic array. Currently, this issue has only been observed on EQL hardware. However it might not be specific to EQL arrays. Please see http://kb.vmware.com/kb/1012232 for more details
    Kburl
    -http://kb.vmware.com/kb/1012232
    List of constituent VIBs:
    -rpm_vmware-esx-iscsi_4.0.0-0.5.175625@i386
    rpm_vmware-hostd-esx_4.0.0-0.5.175625@i386

    Another method of finding out the information above is using vSphere PowerCLI.
    To determine the system level and build number of an ESX 4.0 host using PowerCLI:
    1. Open the PowerCLI command prompt.
    2. Connect to the ESX or ESXi host which reported the warning using the command:

      Connect-VIServer -Server ESXHostnameOrIPAddress

      Note: Authenticate using an administrative user, such as root.
    3. Run this command:

      get-view -ViewType HostSystem -Property Name, Config.Product | select Name,{$_.Config.Product.FullName},{$_.Config.Product.Build} | ft -auto
    To determine the patches or updates applied on the host, run this command:

    Get-VMHost hostname | Get-VMHostPatch | Select Id,InstallDate,Description | ft -auto
    For more information about esxupdate commands in vCLI, see the vSphere Command-Line Interface Reference.

    To determine the patches or updates applied on the ESXi host:

    1. Log in locally to the ESXi host.
    2. In the command prompt, run the command:

      #esxcli software vib list

    Thursday, August 8, 2019

    How to Install latest ESXi VMware Patch

    If you have just installed the latest VMware vSphere 6 for example and want to patch, but you don’t know how? This guide is especially useful if your ESXi host is not connected to the internet. Many folks are waiting for VMware to “polish” the 6.0 release the latest patches which don’t break things, but that’s not always the case.
    The latest patch is cumulative. Those of you who stepped in and runs vSphere 6.7, you might want to install the latest ESXi VMware patch. By having the latest patch, you’re not only safe, but you might also be safe from bugs, which appears after major releases.
    So in today’s post, we look at the patching process. Where to download the latest patches and how to apply them to the host. We will focus on simple CLI method today for environments with single ESXi host. This can be the case for branch office or a test environment or simply a site without the resources to purchase a license package that includes vCenter.
    Step 1: The patch download portal first (you need VMware login – create a free account if you haven’t done yet).
    Select the product you want to download patches (in our case ESXi 6.7)


    Select the patch you want to download. (they are cumulative, download only the latest one).
    Step 2: Download the ZIP file and upload it to a datastore (via VMware vSphere client or via WinSCP for example) that is reachable for the host you want to patch (it can be local or shared datastore) > Bring the host into the maintenance mode > Connect with SSH (via Putty for example or through Firefox and FireSSH) to your ESXi host.
    To enable SSH go and select your host > configuration > security profile > services > properties > SSH.
    Then connect via SSH and run this command:
    esxcli software vib install -d /vmfs/volumes/datastore1/patch-directory/ESXi670-201901001.zip
    So in my case, it was:
    esxcli software vib install -d/vmfs/volumes/465/ESXi670-201901001.zip
    Reboot the host and leave the maintenance mode.
    You’re done. In case you have a vSphere cluster in place you can leverage VMware Update Manager (VUM) which can orchestrate the patching across your cluster where it goes and puts the host in maintenance mode and evacuates VMs via vMotion automatically each time a host within cluster needs to be patched. So you just attach a baseline which includes the latest patches > scans the cluster > remediate….
    You will certainly not patch as I showed in this guide today. But today’s post is certainly useful for isolated, lab environments, or environments where VUM isn’t installed.

    Friday, July 19, 2019

    DCUI from ssh for vSphere 6

    This is one of those great command line items to put in your toolkit that will impress your co-workers. I think this command is one of the least known commands but could have a huge impact on an admins ability to manage their environment. The vSphere command is simply ‘dcui’ and it is a very simple way to access the DCUI without having to go into your remote IPMI tools (ilo, iDRAC, KVM over IP, etc). The only down side compared to IPMI tools is it doesn’t work when you reboot your system as you’ll lose your ssh session.

    How to use it:
    • After your server is fully booted, start an ssh session to your target server and logon
    • From the command prompt type in dcui and press enter

    • From there you can use the dcui remotely.
    • Press CTRL + C to exit

    Tips:

    • Have your ssh screen size where you want it prior to going into the dcui. If you resize after connecting it will exit out of the DCUI
    • The DCUI command worked great in putty but it did not work with the MAC Terminal program. Not sure why, but if you got this working on a MAC then post up!

    Monday, May 20, 2019

    How to join ESXi to Active Directory for Improved Management and Security

    ESXi implements the PAM or Pluggable Authentication Module framework which supports several authentication methods one of them being Active Directory (AD). This means that you can include AD as an authentication mechanism within your vSphere environments. The benefits are many but the ones that sticks out the most is being able to authenticate using an AD user account and using the same, including AD security groups, to grant permissions on vSphere objects. This voids the need to maintain and replicate local ESXi users and groups across multiples instances of ESXi. Single sign-on using Windows credentials is also a cool feature to have.
    User management is also a breeze once AD authentication is enabled. Consider the case of a vSphere admin leaving for pastures green. With AD, it’s a simple matter of disabling his or her user account and you’re done. If on the other hand admins are sharing and using local root or similarly privileged accounts, this insecure practice would call for a password change across the board assuming security is something you cherish.
    So, in today’s post, I’ll go over the process of joining ESXi 6.5 to Active Directory. My test setup consists of a single unmanaged ESXi 6.5 host and a Windows 2012 Domain Controller (DC) running DNS, a single forest / domain setup and hosting all FSMO roles.

    Requirements


    Time synchronization: The time on the ESXi host and the DC must be in sync. To do this, configure both to use the same NTP source or simply configure the NTP service on ESXi to use the DC as a time source. By default, a DC holding the PDC Emulator role is also responsible for keeping time for the whole forest.
    DNS Resolution: The ESXi host must be able to resolve the domain and domain controller(s) DNS names. The easiest solution to this is to add the IP address of a DC which is configured as a DNS server for that domain.
    Root access: Create a group called ESX Admins on Active Directory. AD users accounts assigned to it are automatically granted root access on ESXi.
    Firewall access: Make sure that there is no firewall blocking the following ports both UDP and TCP:
    • 88 – Kerberos authentication
    • 123 – NTP
    • 135 – RPC
    • 137 – NetBIOS Name Service
    • 139 – NetBIOS Session Service (SMB)
    • 389 – LDAP
    • 445 – Microsoft-DS Active Directory, Windows shares (SMB over TCP)
    • 464 – Kerberos – change/password changes
    • 3268- Global Catalog search

    Configuring Active Directory


    There’s little work to be done here. Just add A and PTR records for the ESXi host to the domain’s DNS zone as shown in Figure 1.
    Figure 1 - Creating DNS records for ESXi on a Microsoft DNS server
    Figure 1 – Creating DNS records for ESXi on a Microsoft DNS server

    Using the ADUC MMC console, create a security group called ESX Admins and add the AD users whom you want ESXi root privileges assigned to.
    Figure 2 - Creating the ESX Admins security groups in AD
    Figure 2 – Creating the ESX Admins security groups in AD

    In reality, you can specify any AD group of your liking provided you amend the Config.HostAgent.plugins.hostsvc.esxAdminsGroup advanced setting as shown in Fig. 3.
    Figure 3 - Specifying an alternative AD ESXi root user group using the embedded ESXi host client
    Figure 3 – Specifying an alternative AD ESXi root user group from the embedded ESXi host client

    Configuring ESXi


    You can configure ESXi 6.5 several ways. These include the DCUI, the ESXi command line, PowerCLI or via the embedded ESXi host or thick client.

    Enable the Active Directory Firewall Rule
    While writing this post, I learned that the Active Directory All firewall rule on ESXi is disabled by default. This, of course, plays havoc with the AD integration process since ESXi won’t be able to reach the DC. Using the host client, enable the firewall rule as shown in Figure 4. Highlight the rule, right-click on it and select Enable.
    Figure 4 - Enabling the Active Directory All firewall rule on ESXi
    Figure 4 – Enabling the Active Directory All firewall rule on ESXi

    DNS Settings
    The easy way to configure DNS settings on ESXi is via the DCUI or the thick client. This is shown respectively in Figures 5 and 6. From the DCUI, log in as root, press F2 and navigate to the DNS Configuration menu option and press Enter.
    On the DNS Configuration window, add the IP address of a DC running the DNS service as a primary or alternate DNS server. The Hostname value must match the DNS A record created for the ESXi host in the domain DNS zone.
    Figure 5 - Configuring the DNS settings on ESXi using the DCUI
    Figure 5 – Configuring the DNS settings on ESXi using the DCUI
    Figure 6 - Configuring the DNS settings on ESXi via the thick client
    Figure 6 – Configuring the DNS settings on ESXi via the thick client

    NTP Configuration
    As per the requirements, ESXi must be time synced to the domain. One way of achieving this, is to add the IP address of the DC holding the PDC role to the list of NTP servers on ESXi. Figure 7 outlines how to do this using the thick (C#) client. Make sure that the NTP Client Enabled option is ticked on.
    Figure 7 - Managing the NTP service on ESXi via the thick client
    Figure 7 – Managing the NTP service on ESXi via the thick client

    Alternatively, SSH to ESXi, log in as root and edit /etc/ntp.conf using vi. Add the line server x.x.x.x as shown in Fig.8 where x.x.x.x corresponds to the IP address of the NTP server you wish to use, which in my case happens to be the DC itself. When you’re done, restart the ntp service by running /etc/init.d/ntpd restart as shown in Fig. 8.
    Figure 8 - Adding an NTP time source via the command line and restarting the NTP daemon
    Figure 8 – Adding an NTP time source via the command line and restarting the NTP daemon

    Once SSH’ed to ESXi, carry out an nslookup test to see if the AD domain name can be resolved. As per my example, the AD domain name is gojira.local which correctly resolves as shown in Fig. 9.
    Figure 9 - Running nslookup to check if the AD domain name resolves correctly
    Figure 9 – Running nslookup to check if the AD domain name resolves correctly

    Joining Active Directory


    Now that the pieces are all in place, it’s just a matter of joining ESXi to the domain. To do this, I’ve used the embedded host client to make things a little bit interesting. If you wish, however, you can do the same via the ESXi command line or the thick client.

    Using the embedded host client
    • As per Figure 10, log in as root and select Manage from Navigator.
    • Select Authentication (3) from the Security & Users tab (2).
    • Next, click on the Join Domain button (4) and enter the AD domain name (5) and credentials (6) with the required rights to join computers to a domain. Make sure to abide by the formatting shown in the screenshot.
    • Click Join Domain (7) from the Join Domain window. ESXi is added to Active Directory as per the highlighted fields in green.
    Figure 10 - Use the host client to join ESXi to Active Directory
    Figure 10 – Use the host client to join ESXi to Active Directory

    You can leave the domain any time by clicking on the Leave domain option.

    Using the ESXi command line
    Later versions of ESXi include the domainjoin-cli cmdlet from the likewise-open package which is also included with many Linux distros.
    On ESXi 6.5, the command is executed from /usr/lib/likewise/bin. If you haven’t enabled the AD firewall rule mentioned earlier, you must temporarily unload the ESXi firewall – assuming it is enabled – for this to work. Failing this, you will get an Error: NERR_DCNotFound [code 0x00000995] error.
    The cmdlet syntax is this: domainjoin-cli join administrator password. You can omit the password and type it in instead. Figure 11 shows how the first join attempt failed because of the firewall while a second attempt succeeded when the firewall was temporarily disabled.
    Figure 11 - Joining ESXi to AD using domainjoin-cli
    Figure 11 – Joining ESXi to AD using domainjoin-cli

    As per Fig. 12, you can run domainjoin-cli query to verify that the DC is reachable.
    Figure 12 - Running domainjoin-cli query to verify correct AD functionality
    Figure 12 – Running domainjoin-cli query to verify correct AD functionality

    From the AD side of things, you should see a new computer account created for ESXi under Computers.
    Figure 13 - A computer account for ESXi is created in AD on joining the domain
    Figure 13 – A computer account for ESXi is created in AD on joining the domain

    Time to test!


    Single sign-on using Windows credentials
    The thick (C#) vSphere client gives you the option to log in with the currently logged on Windows user provided you’re on the same domain as ESXi. Sadly, the embedded ESXi host client does not offer the same functionality, at least not for the time being.
    Next up is a video that shows SSO in action when using the old vSphere client. In addition, I also show where from ESXi is be joined to and removed from an AD domain.


    Granting permissions on vSphere objects
    Since ESXi is now an AD resource, permissions using AD security principals can be assigned to it and the vSphere objects it holds. In this next video, I demonstrate how to grant administrator access on a single VM to a user called gojira\jason. Access to any other vSphere object or view is denied.

    The same can be carried out using the embedded host client. The caveat here is that you must explicitly type in the AD user account or group as AD resources are not exposed by the client, unlike the thick client which lists them in a drop-down box. This is something else the VMware development team are currently looking into and will implement if possible.
    Figure 14 - Granting permissions using AD security principles via the embedded ESXi host client
    Figure 14 – Granting permissions using AD security principles via the embedded ESXi host client