WSUS is running in your infrastructure for many years, and is doing a pretty good job at patching your clients and your servers, but now has come to a point where you need to migrate it to a new box. This usually happens when the OS is at the end of life support (EOL) or the hardware has reached the warranty limit. Another reason why migrate and not start with a new installation is so you don’t have to download from Microsoft the required updates and approve them all over again. I don’t know about you, but approving hundred of updates is not something I will do for a second time. In either case, the service needs to be migrated with minimal downtime and not to much headache.
To simulate this, I installed one WSUS service on a 2003 server, and this one is the WSUS that is patching the infrastructure right from the beginning. I named it WSUS-OLD for the sake of the example and for you to better follow the migration procedure. If your WSUS is not running on a 2003 server, no problem, this works with every OS version you might have. The second WSUS server will run on a 2012 R2 server and this will replace the old WSUS. I’m going to name the new server WSUS-NEW, again, for the sake of the example. Both of them are installed with a local database, but in case yours are configured with a remote SQL, don’t worry, it works either way the same. You can have your old WSUS with a local database and the new WSUS with a remote SQL server or vice versa.
Now, on the new server go ahead and install WSUS and when you get to the configuration wizard set it as a downstream replica server; point it to your working WSUS.
[notice]If there is a firewall between the two WSUS servers you will need to open the proper port (80, 8530 or 443) in order for them to be able to communicate. [/notice]
Start connecting to save and download upstream server information.
At the end of the configuration wizard choose to begin the initial synchronization then click Finish. Be patient, it will take a while.
Once the synchronization is done your two WSUS servers should look almost the same.They should have the same computer groups, approved updates, downloaded updates, etc.
One thing they are not synchronizing are the configuration options, and unfortunately these configurations will need to be done manually. Don’t worry, it’s a two minute job, but before you can do that the new WSUS server needs to be set in an autonomous mode. Go to Options > Update Source and Proxy server and un-check the box This server is a replica of the upstream server then click the radio button Synchronize from Microsoft Update.
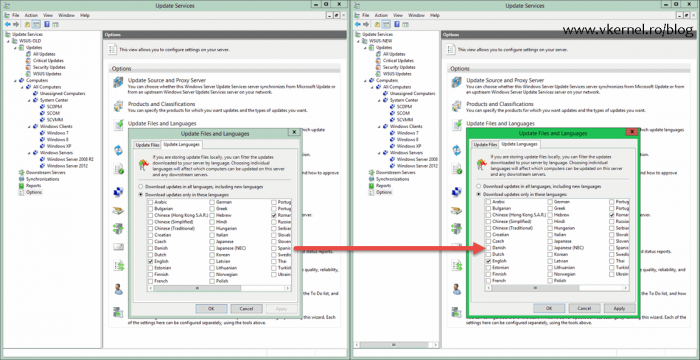
Now you can go ahead and match the rest of the options with the old WSUS server, like Products and Classifications, Update Files and Languages, computers assignment, E-Mail Notifications.
Once the options between the two servers match, the last step is to modify your group policy in order to point your clients to the new WSUS server. Open your GPO or GPOs and change the server name from the Specify intranet Microsoft update service location policy.
After a few hours, clients should appear in the WSUS console at the exact same patch level they were on the old WSUS server. If you want to force the process on one or two of the clients just to see if it actually works do a gpupdate /force to get the new policy then type wuauclt /detectnow and wuauclt /reportnow to force checking for updates and to report to WSUS. Wait a few days, and if everything is working fine you can go ahead and decommission the old box. And that’s it !
Migrating WSUS to a new server is not a difficult process and it can be done with minimal downtime. The hard part is to wait for all the clients to get the new policy and register themselves with the new WSUS server. Everything after that is the same as it was before, approve/decline updates and patch the systems in your environment.


No comments:
Post a Comment